
🛠 Maintaining your user account trouble-free.
Invite User
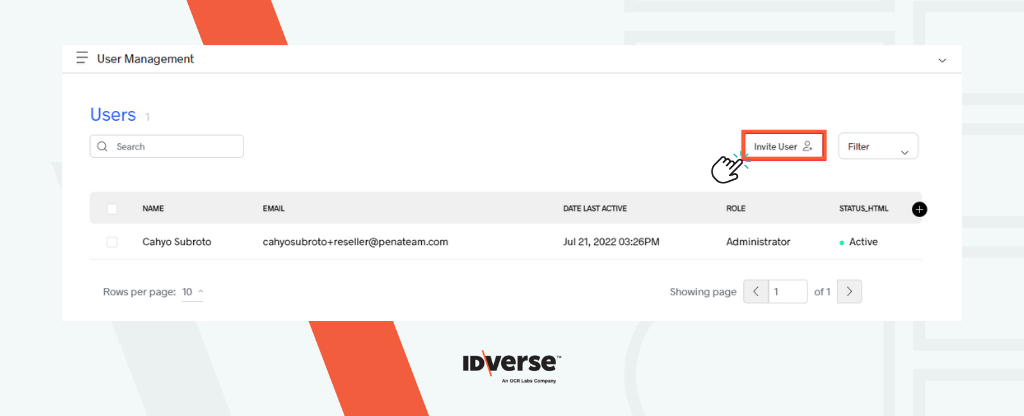
- Administrators can add new users within the user management screen by using the Invite User button.
-
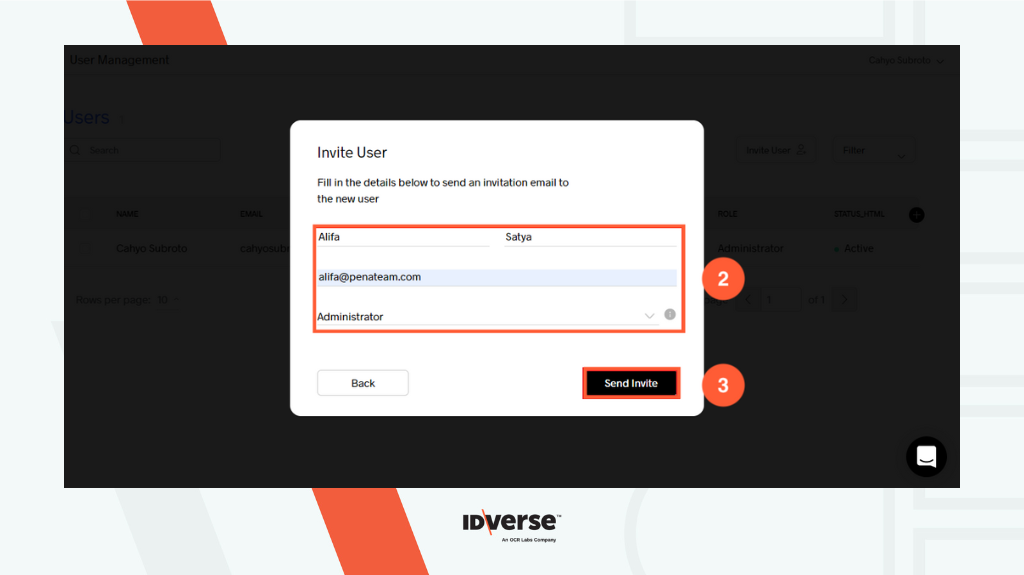
Set up the new user's first name, last name, email address, and role (Administrator only).
-
Click the Send Invite button to send an invitation to the new user's email, so the user can set their password and access the portal.
Note:
As a Reseller, you can only set the Administrator role.
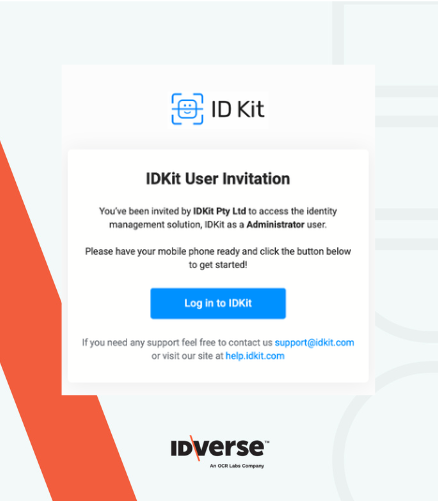
- The following image shows what the invitation email will look like for the new user > Click on the Log in to IDKit button.
-
The user will be redirected to the portal to set their password. The users will be asked to enter their desired password twice to ensure they have set their password correctly
-
Click Next to confirm your password.

-
After the user has successfully set their password, they will be asked to enter their phone number for verification purposes. They will have to enter their phone number twice to ensure the user has entered their correct phone number.
-
Click Send to invite.

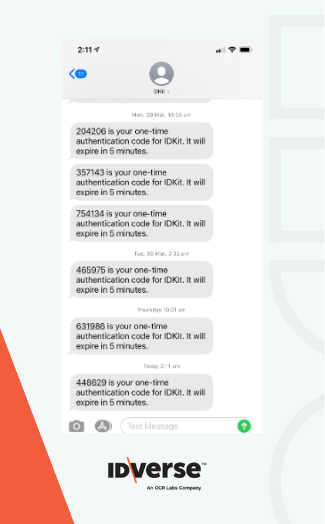
- Verification is done by sending a text message with a 6-digit verification code to the user's phone.
-
The user will have to input their unique generated 6-digit verification code within the portal to proceed with their login process.
-
Click Next to proceed.

-
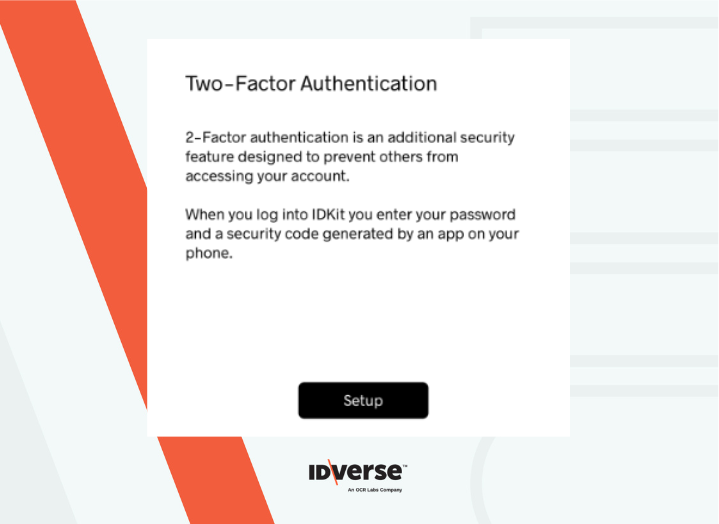
Finally, the user must generate an authorization code using a Two-Factor Authentication (2FA) mobile app. This is a secondary layer of security for the better safety of the user.
-
Click the Setup button.
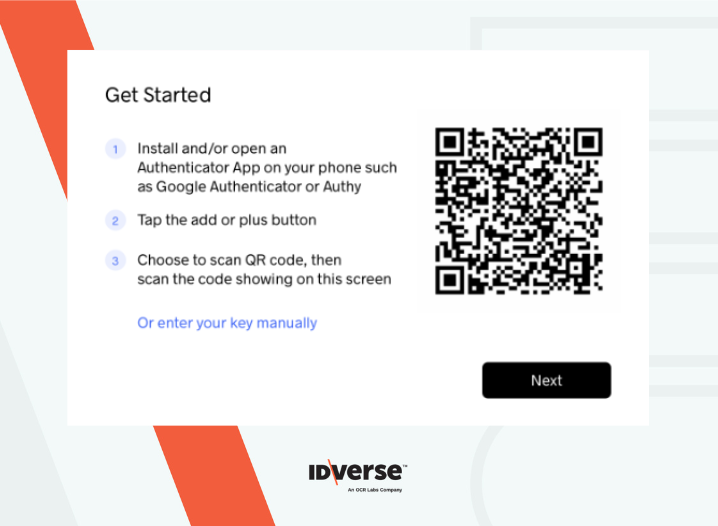
- Follow the steps to obtain the 2FA code by scanning or entering the code manually.
Edit User Profile
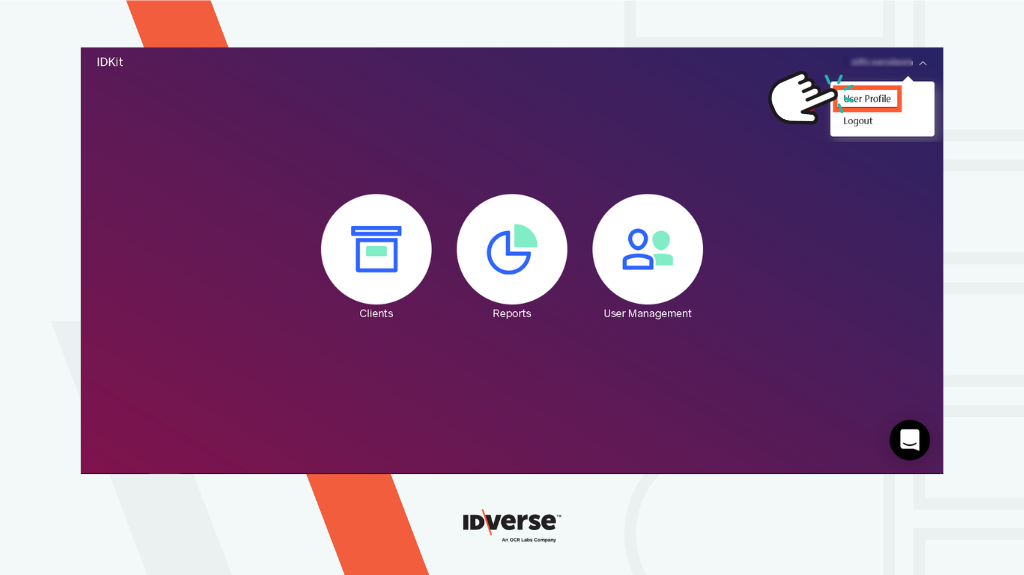
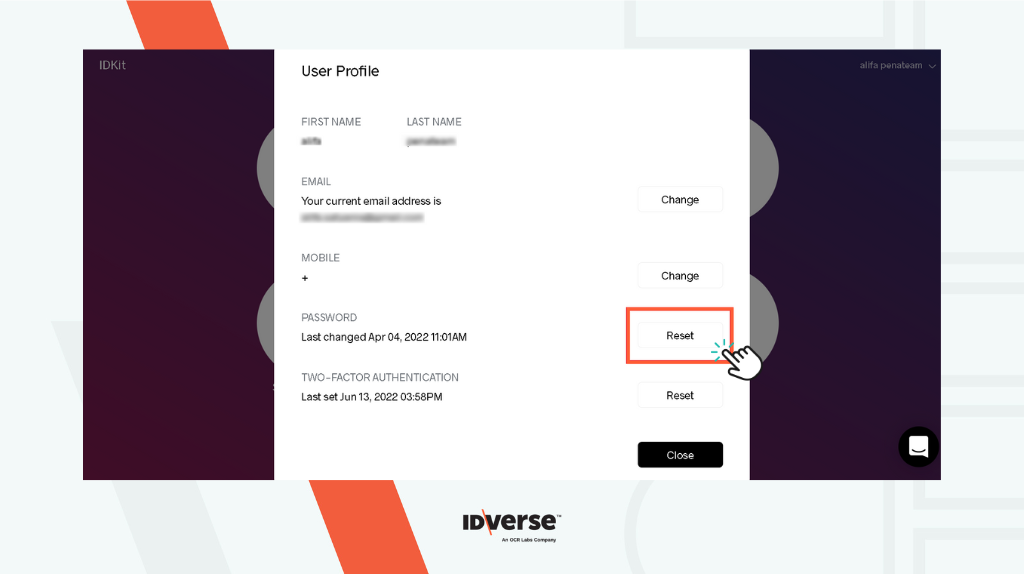
Administrators can edit their profiles by going to the top-right drop-down menu. The following is the procedure for Administrators to change their user profiles:
- Go to the top-right drop-down menu on your IDKit portal and select User Profile.
- The User Profile menu will open the following window where the Administrator can edit their user profile.
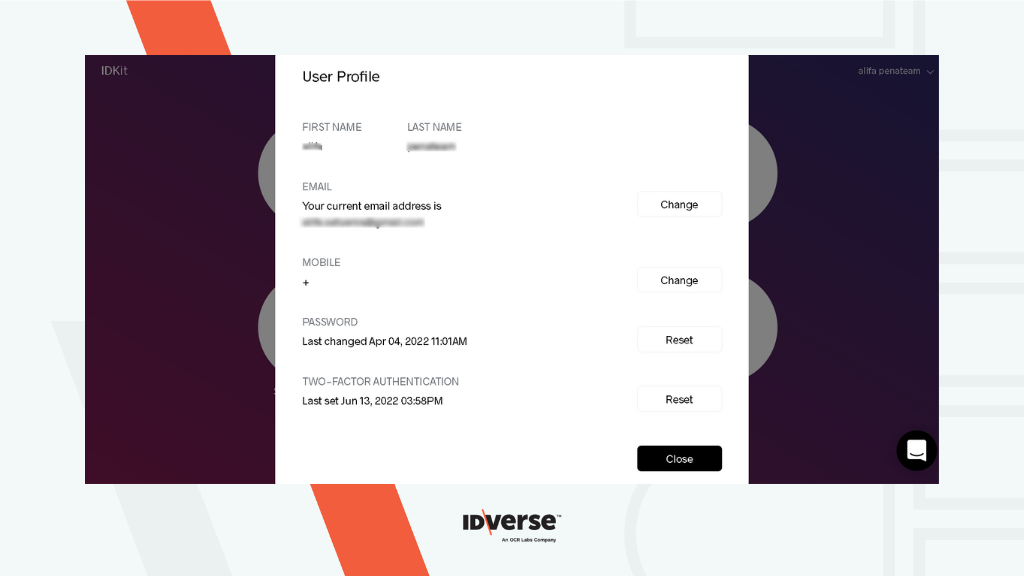
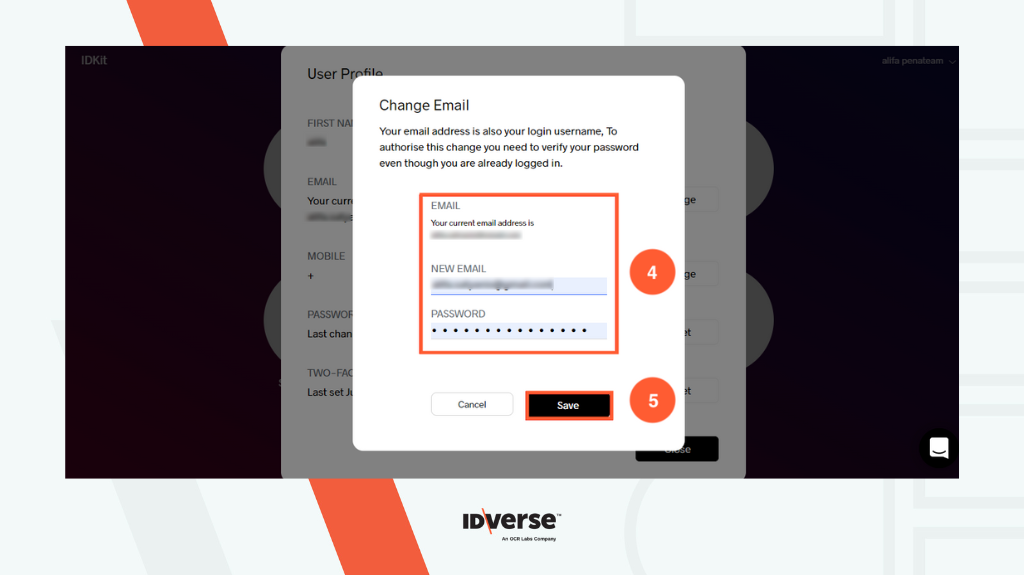
- Select the Change button on the Email field to change your email.

-
The Change Email window will pop up. The administrator can change their email by using their password. Fill in the correct information in the corresponding fields.
-
Press the Save button to save the changes.
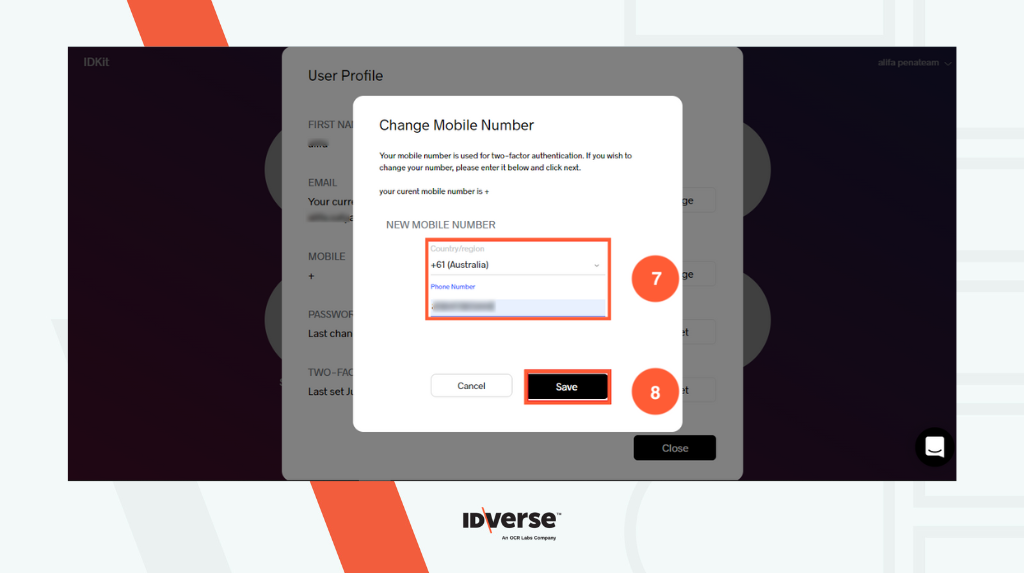
- To change your mobile number, select the Change button on the Mobile field.

-
The Change Mobile Number window will pop up. The administrator can change phone numbers by filling in the corresponding fields.
-
Click on the Save button to save the changes you have made.
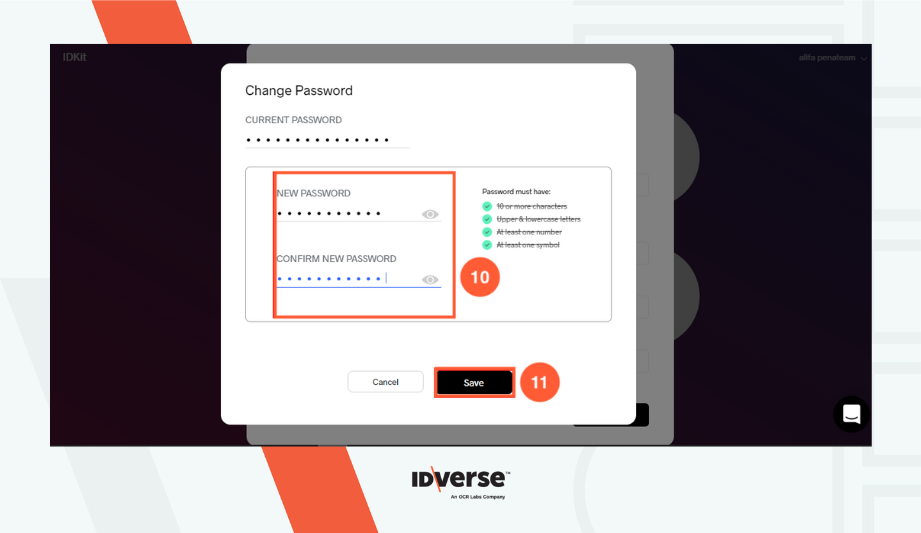
- Select the Reset button on the Password field to reset the password.
-
The Change Password window will pop up. The administrator can change their password by filling in the corresponding fields.
-
Press the Save button to save the password.
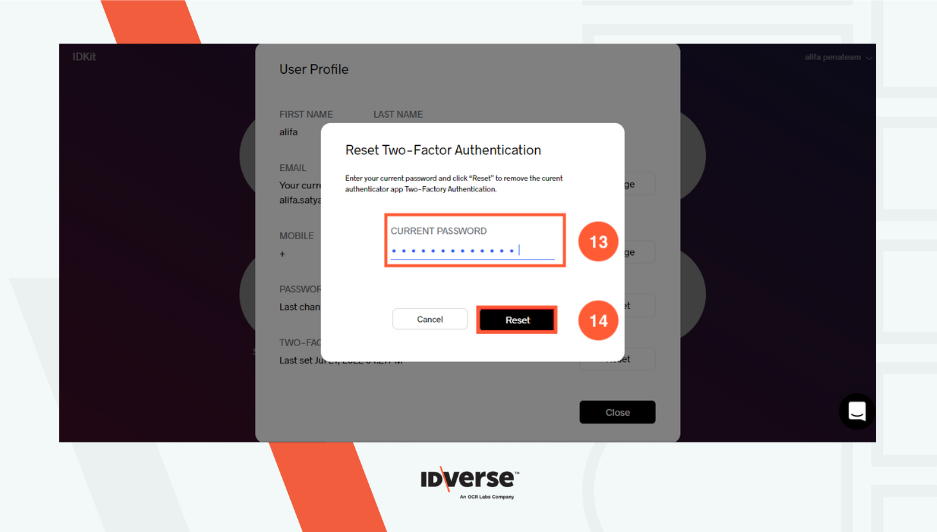
- To reset the 2FA, select the bottom Reset button.
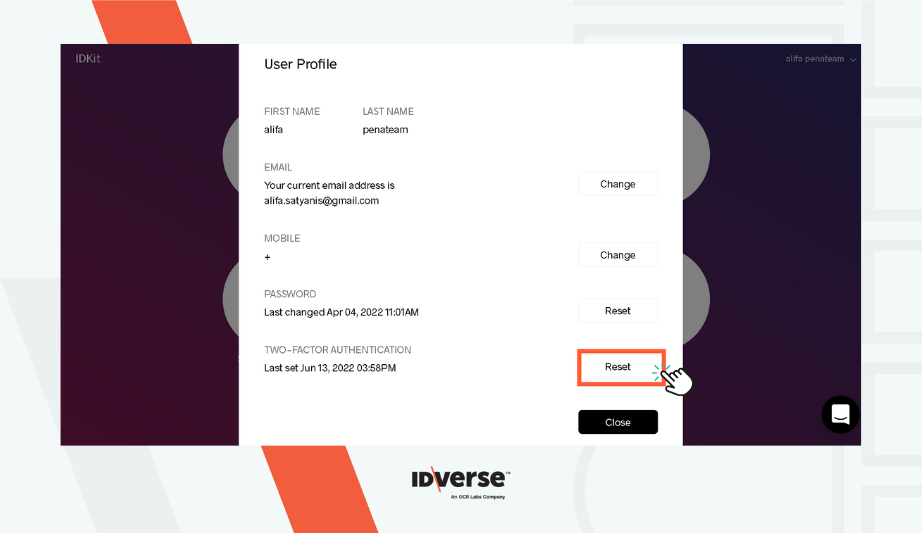
-
The Reset Two-Factor Authentication window will pop up. The administrator can change their 2FA by filling in the corresponding fields.
-
Click the Reset button.
Reset Password
Reset Password allows the Administrator to change the user's password permanently. Please refer to the following steps to do so. There are two ways to reset it: from the User Management menu or User Profile.
Reset from the User Management menu
- Go to the Users menu on the IDKit portal > select the user > click Reset Password button > click Reset button.

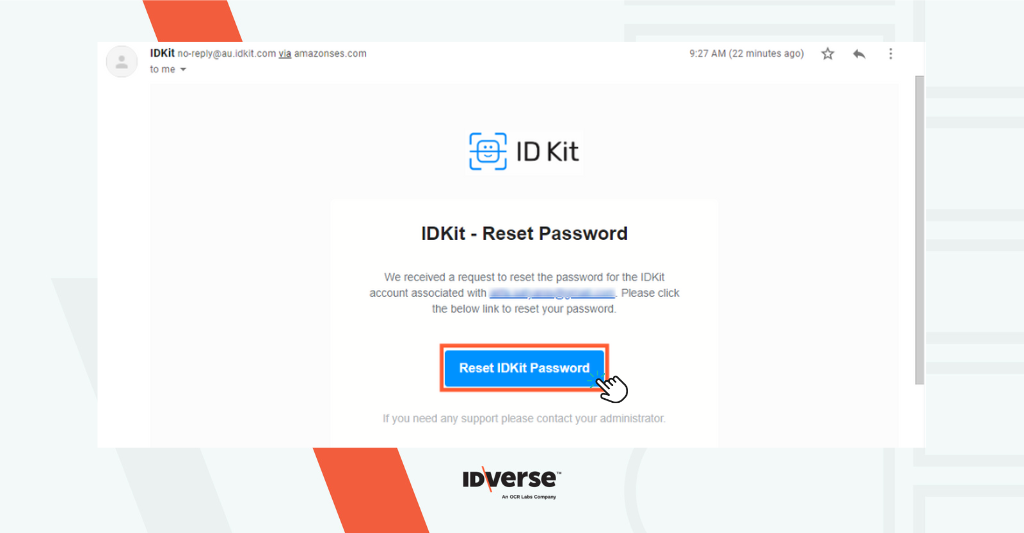
- The User will receive a reset password email from IDKit > Click the Reset IDKit Password button.
-
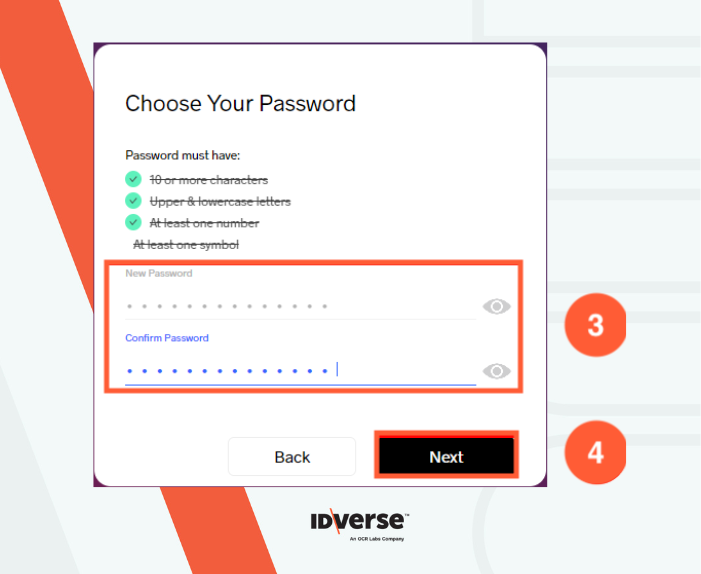
You will be redirected to a page where you can set IDKit's new password. Fill in the new password in the corresponding field.
-
Click the Next button to proceed.
-
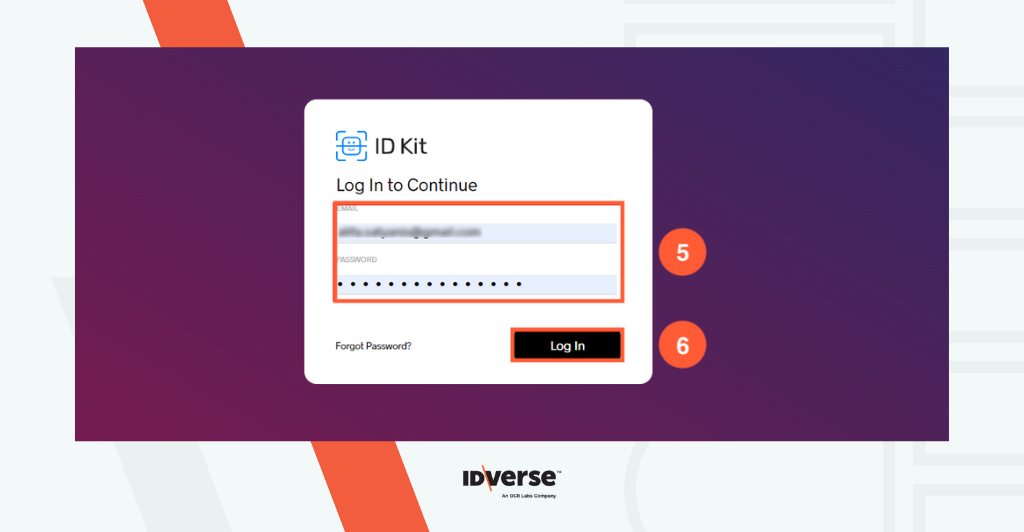
You will be redirected to the login page of the IDKit portal. Fill in the respective fields correctly.
-
Click the Log In button.
Reset from User Profile
- Click the username on the top-right side of the portal.
- Click the User Profile option.
- Click Reset on the Password section.

- Populate the New Password and Confirm Password fields.
- Click the Save button to save the new password.
- A notification message will pop out saying, "Your Password has been successfully reset"
