
👀 Manage your client's configuration by following these simple steps!
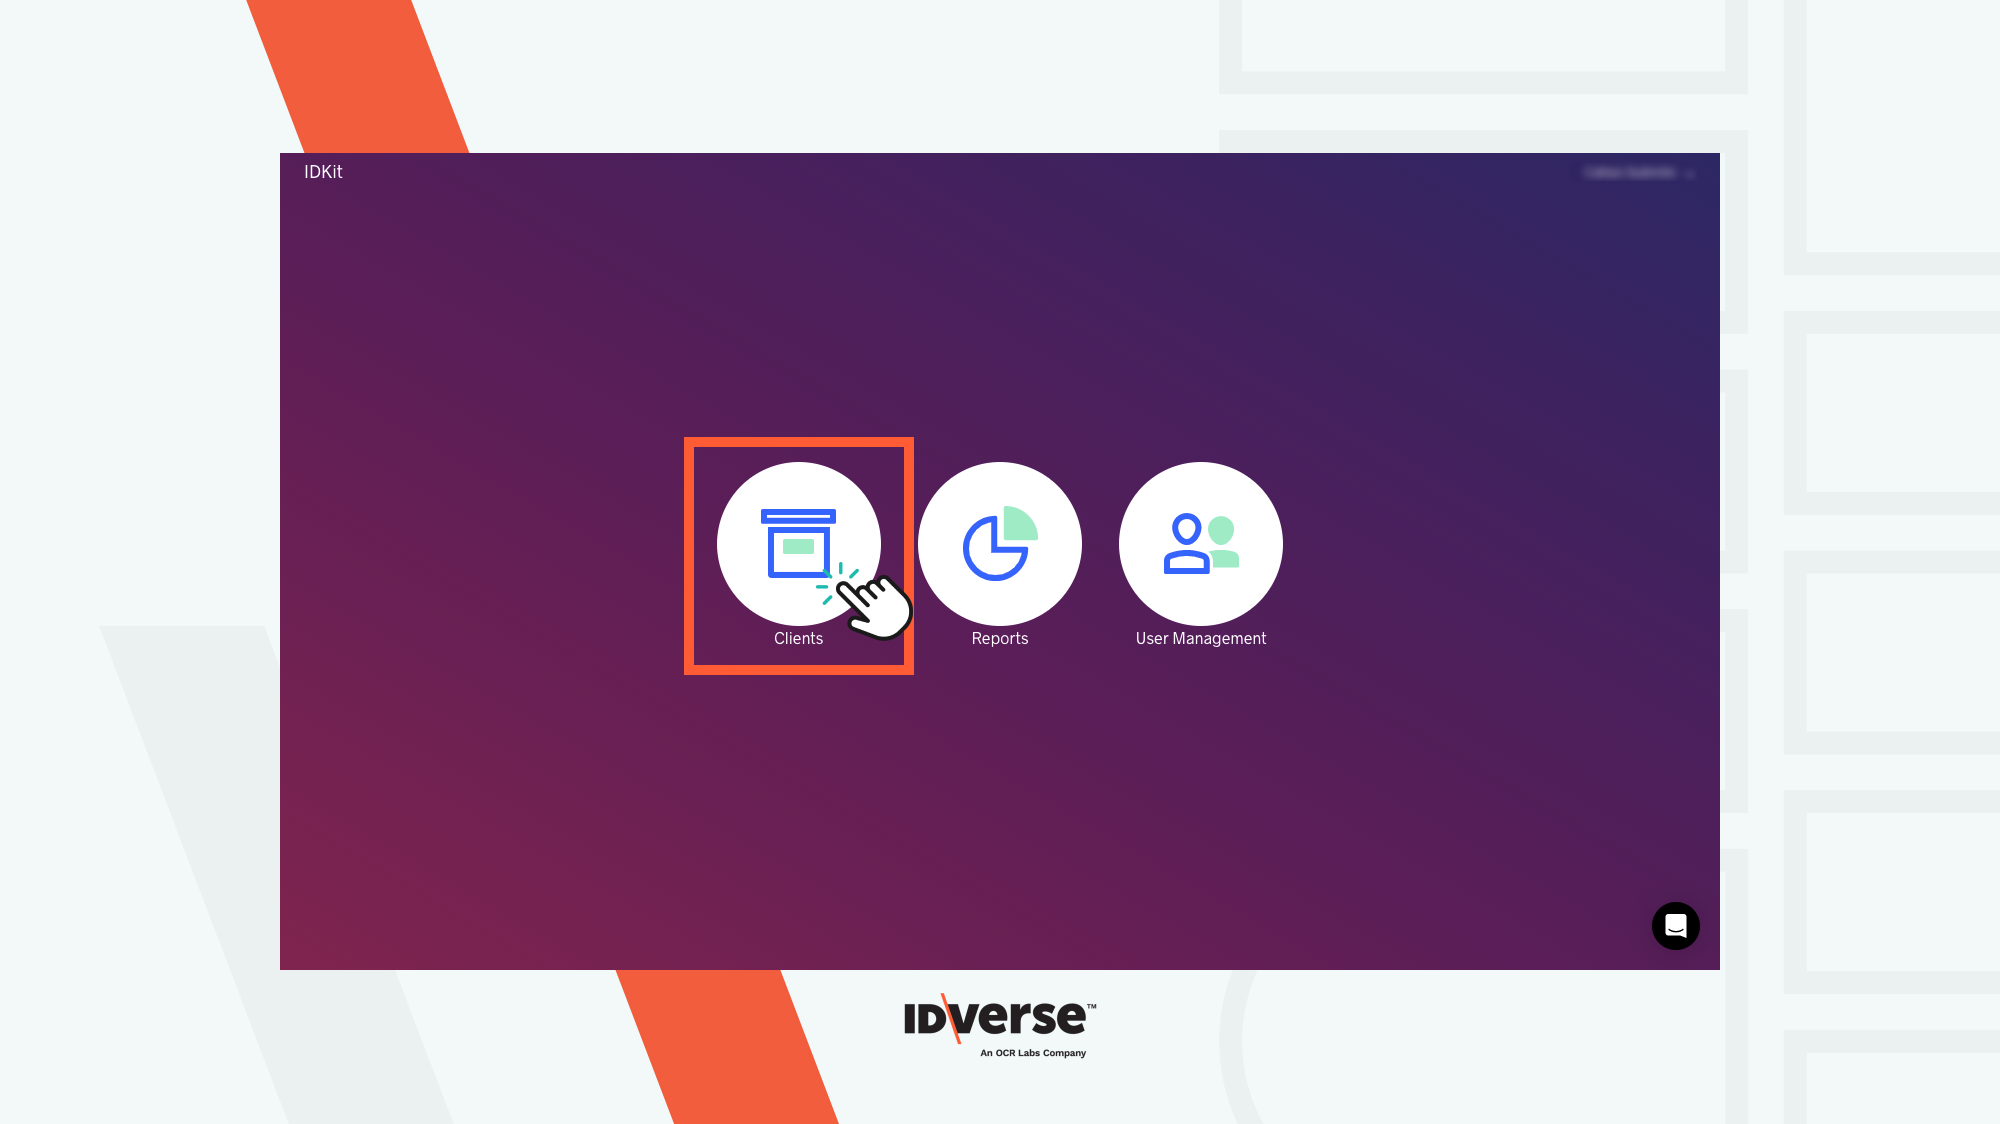
- Go to the Clients menu on your IDKit portal.
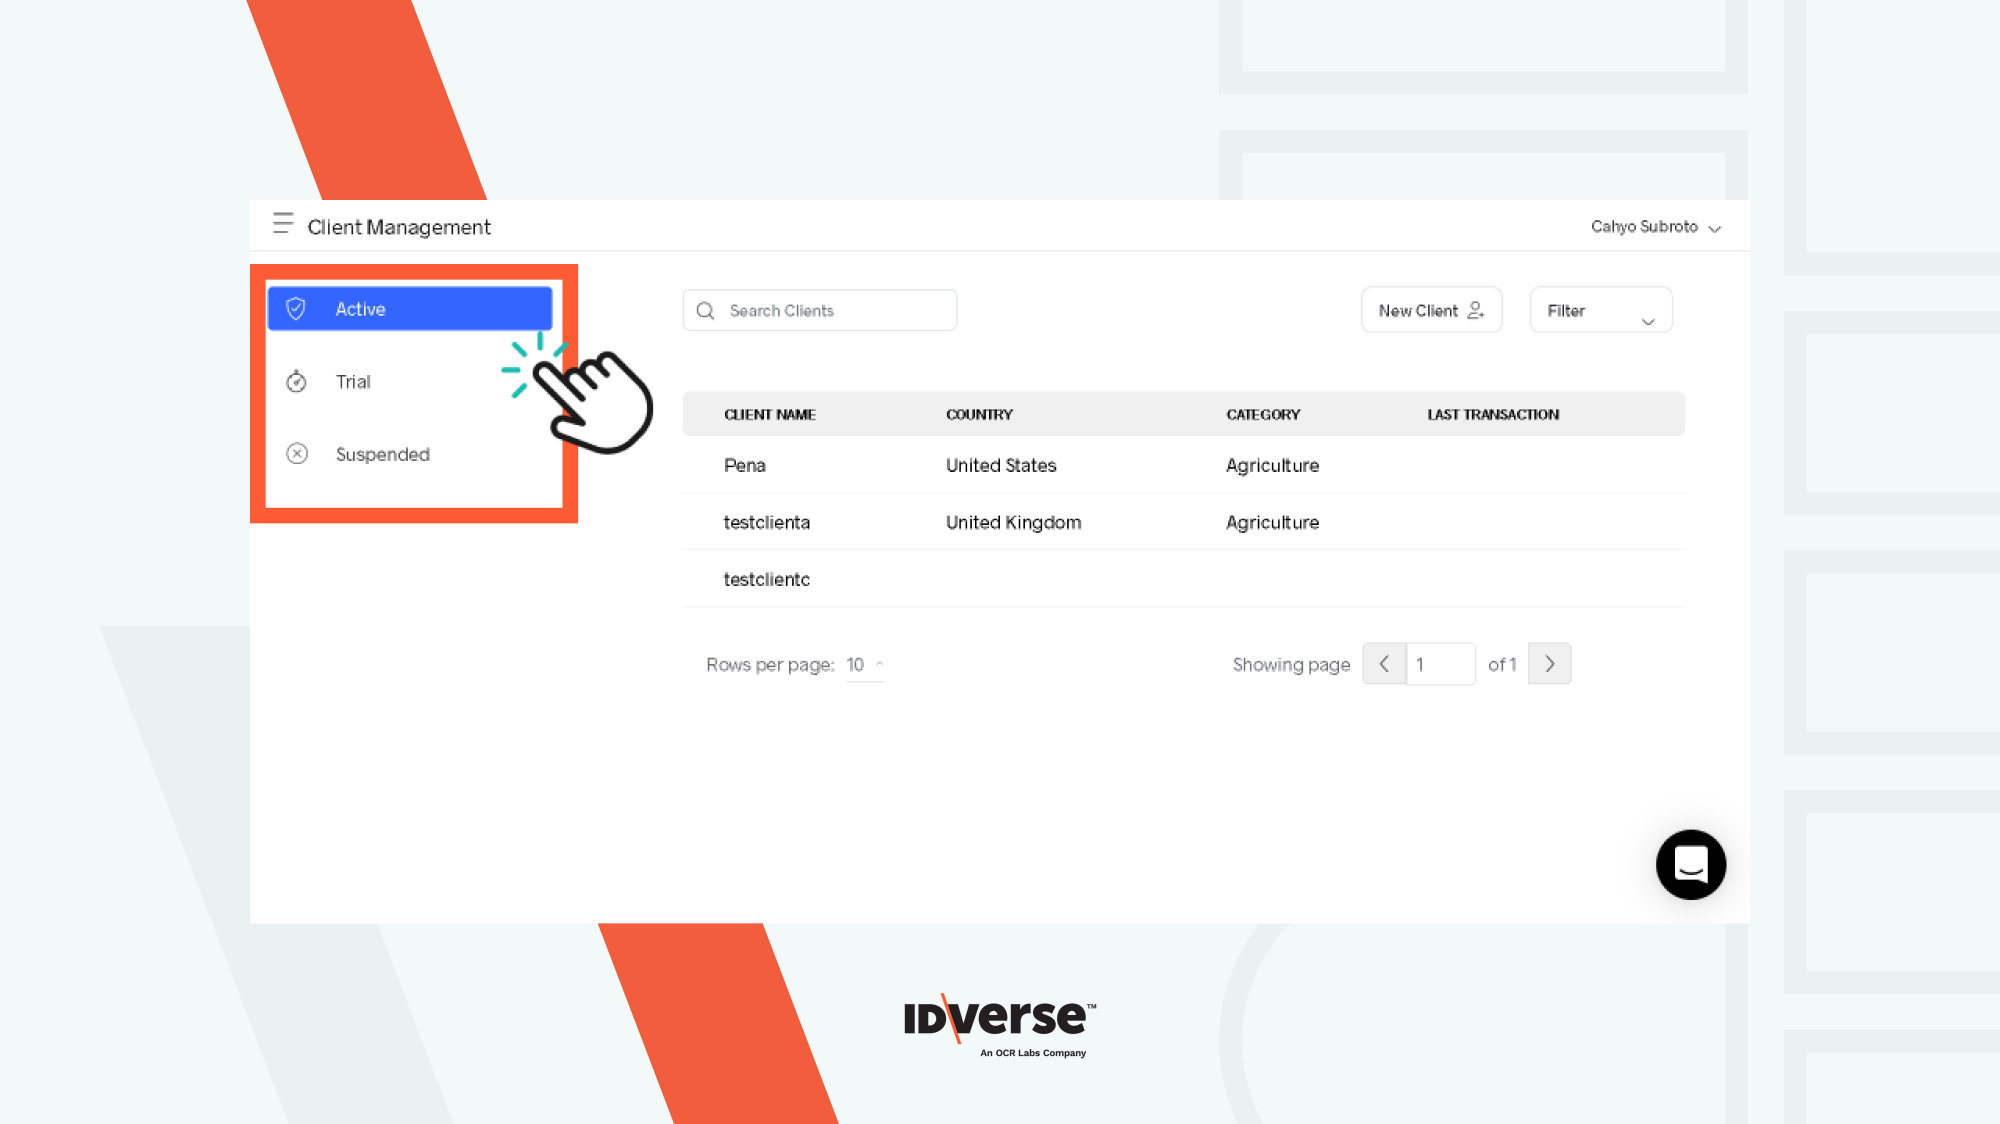
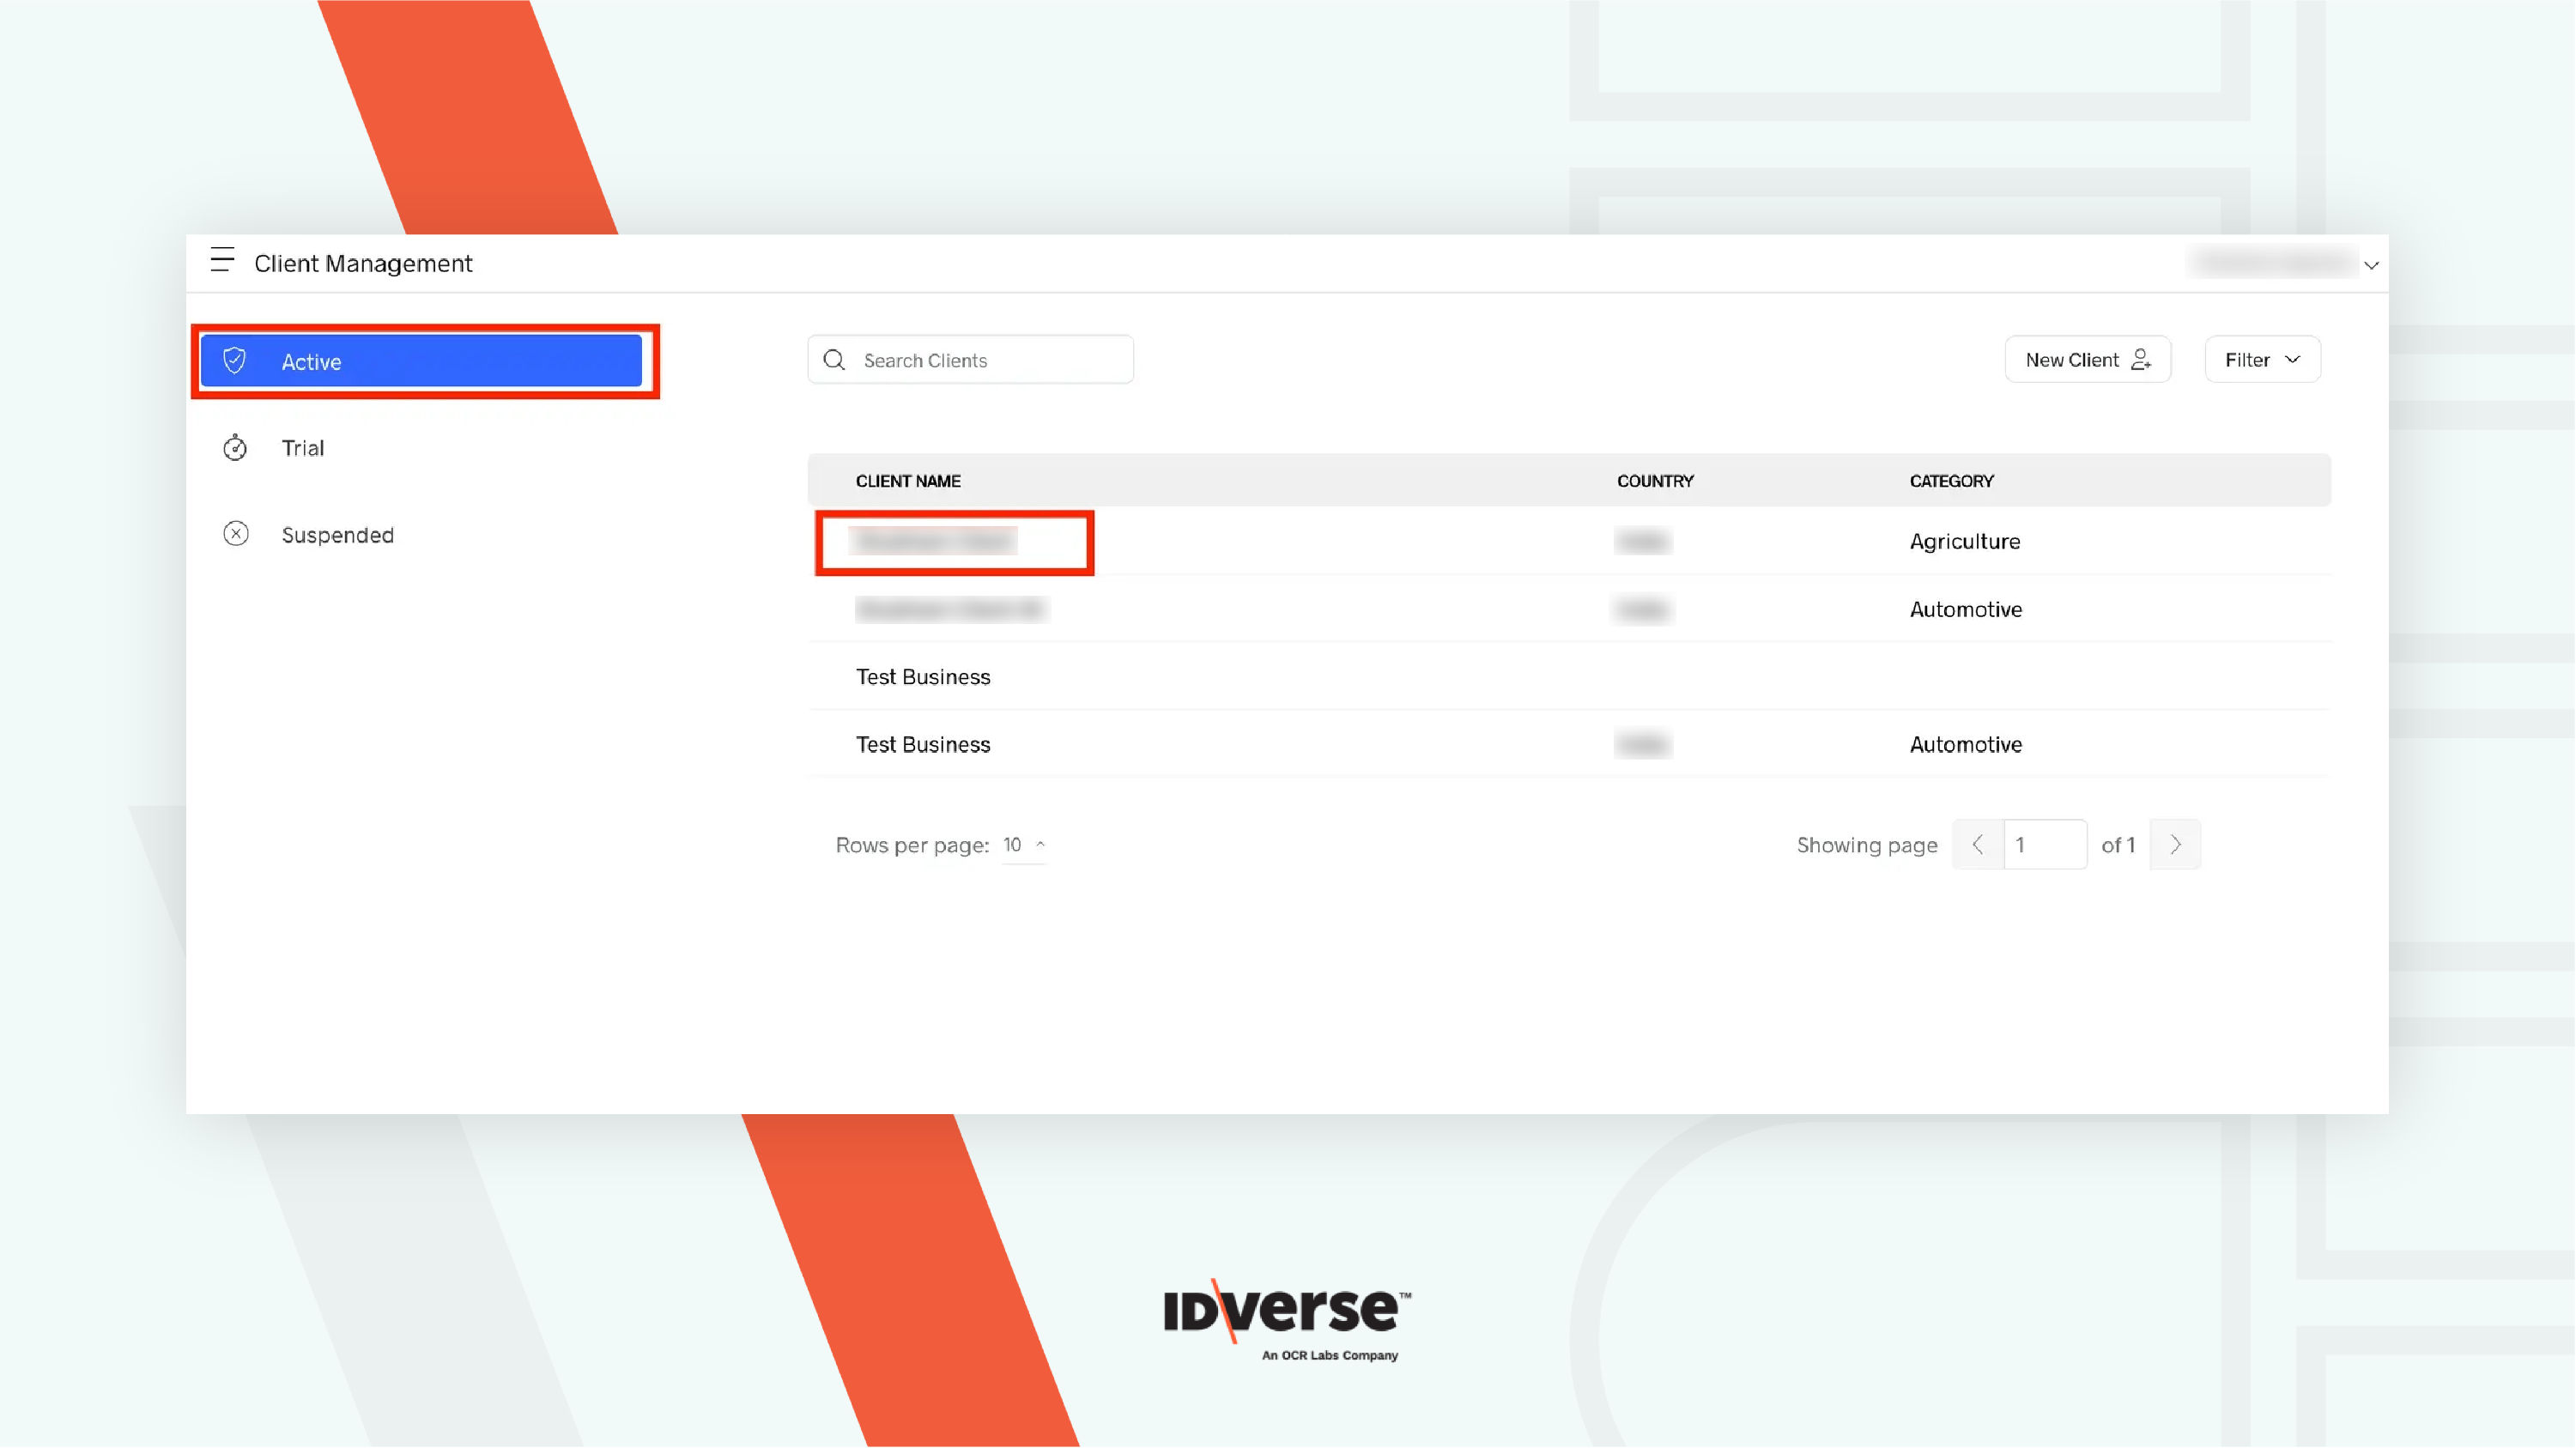
- The Client Management screen will be displayed. By default, you should see the Active tab selected on the top left. Here you can view and edit your clients' information.

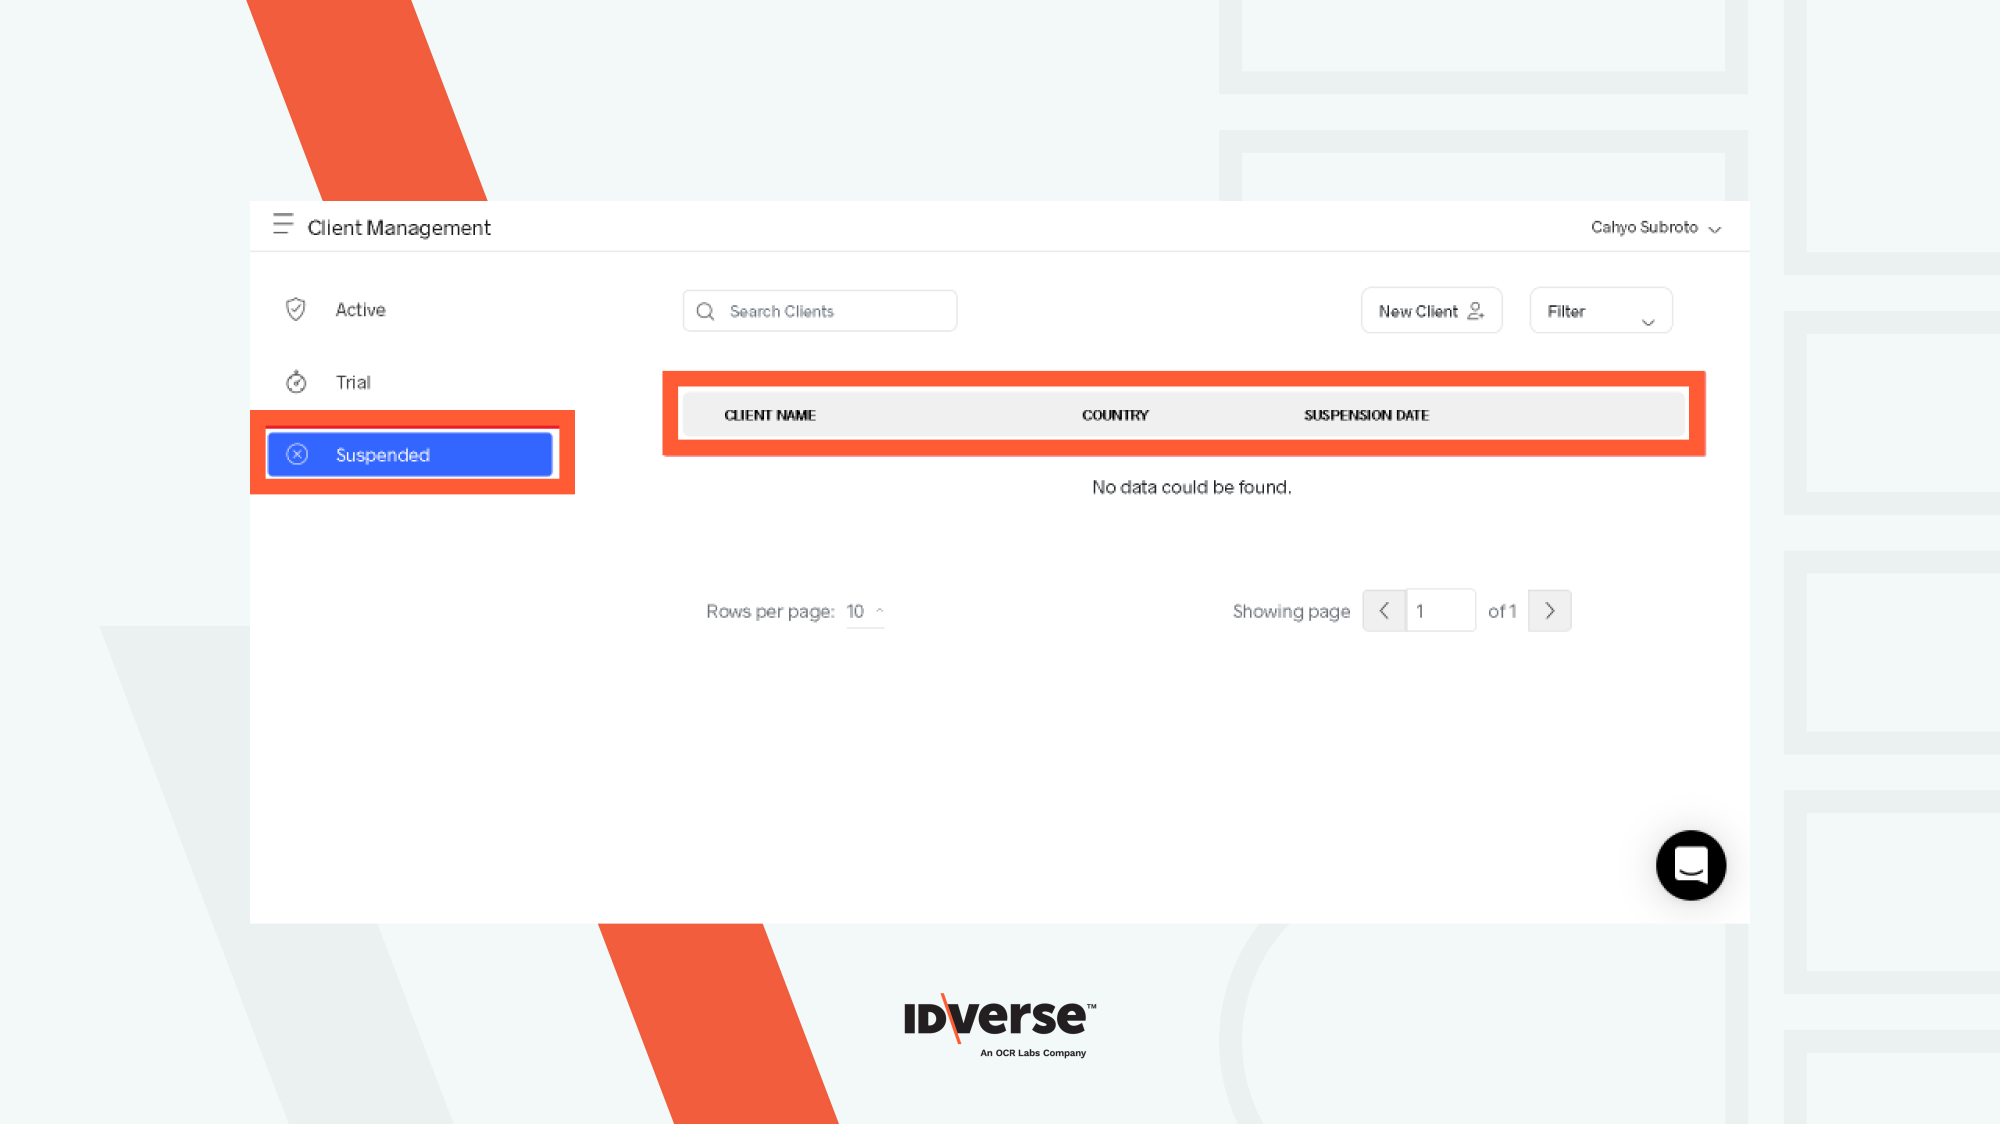
- You can navigate through the different tabs on the left by clicking on them. Selecting each tab will change the display to show the corresponding clients with the status that matches the tab title. The statuses are: Active, Trial, and Suspended.
| Client Tab | Description |
|---|---|
| Active | This tab contains the list of active clients. |
| Trial | This tab contains the list of trial clients. |
| Suspended | This tab contains the list of suspended clients. |
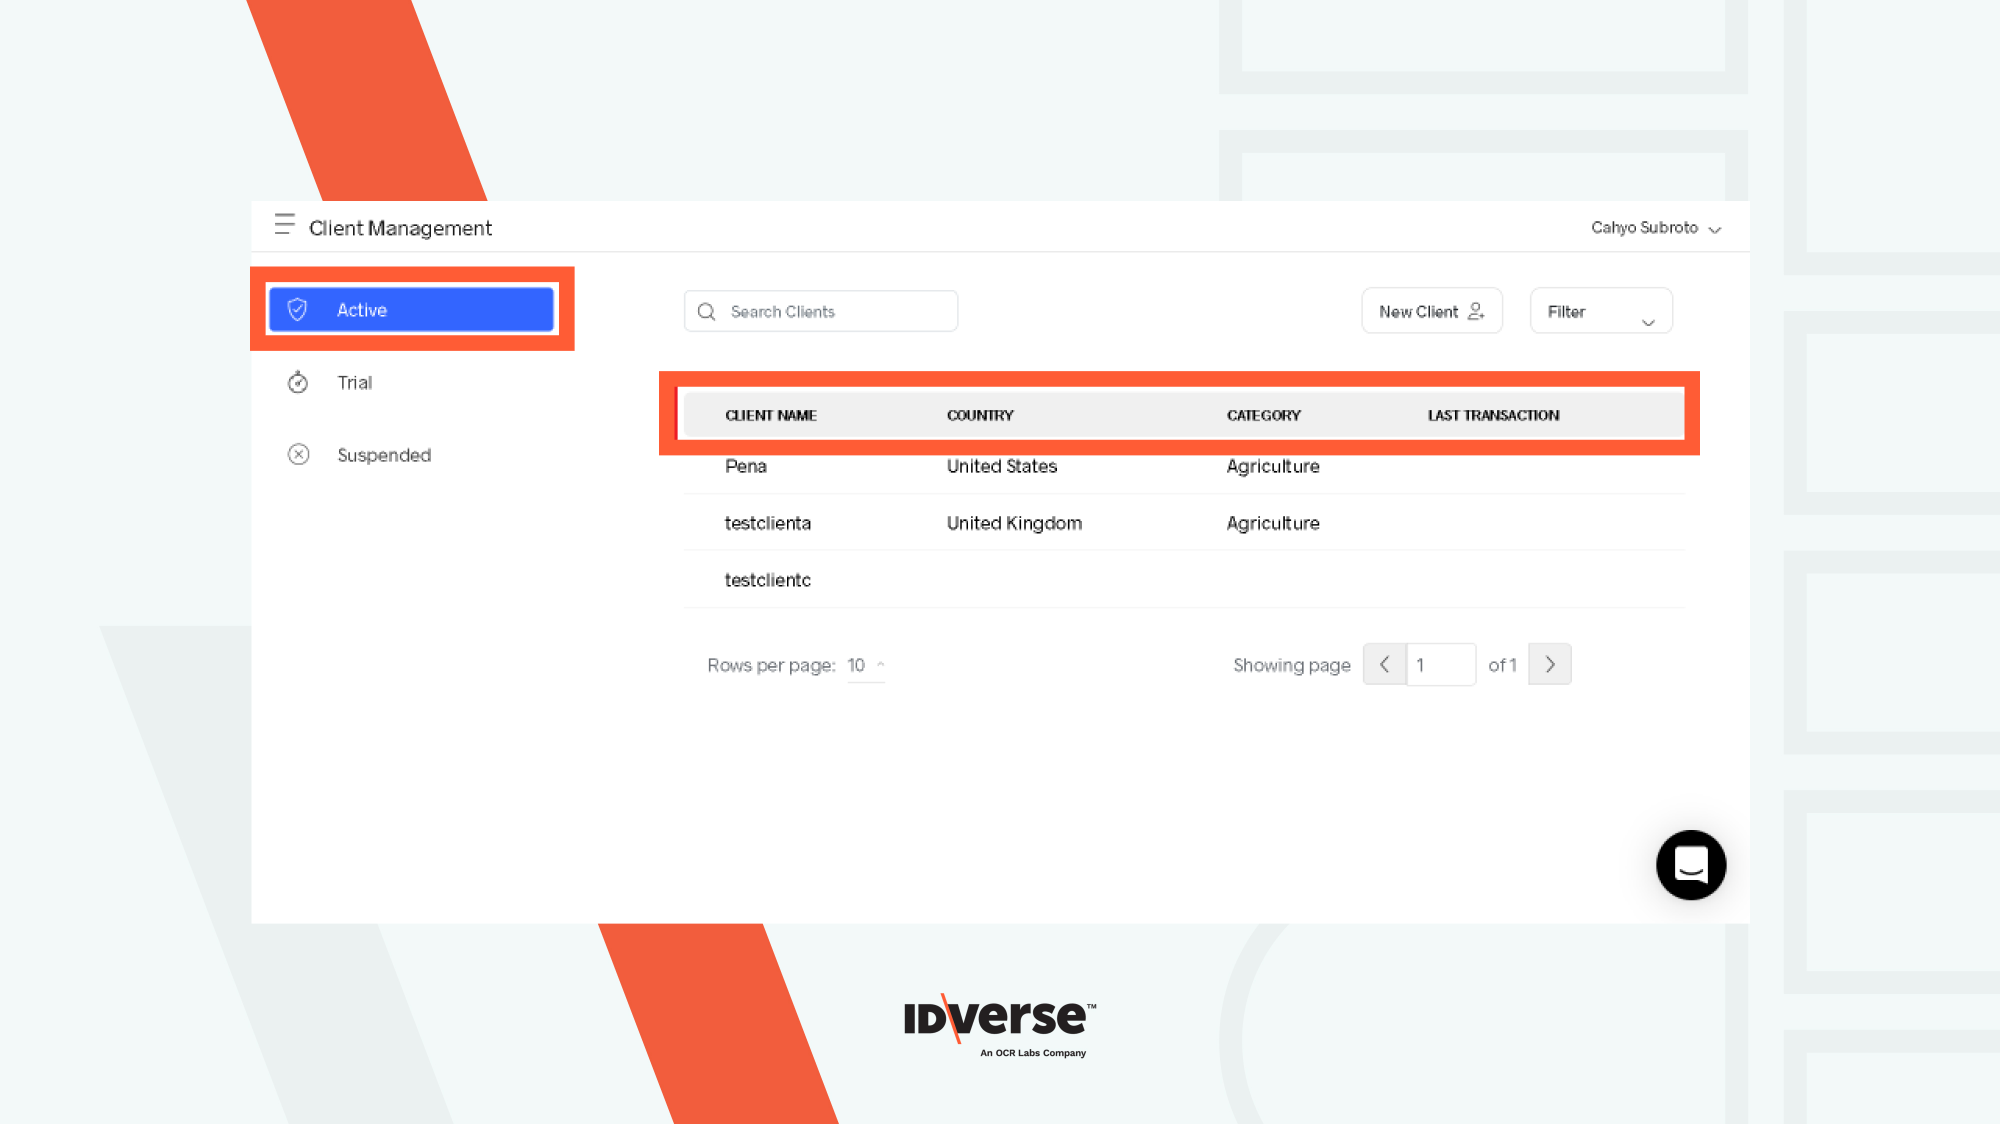
- With the Active tab selected, all your active clients will appear on the list. The columns are categorized by CLIENT NAME, COUNTRY, CATEGORY, and LAST TRANSACTION from left to right.
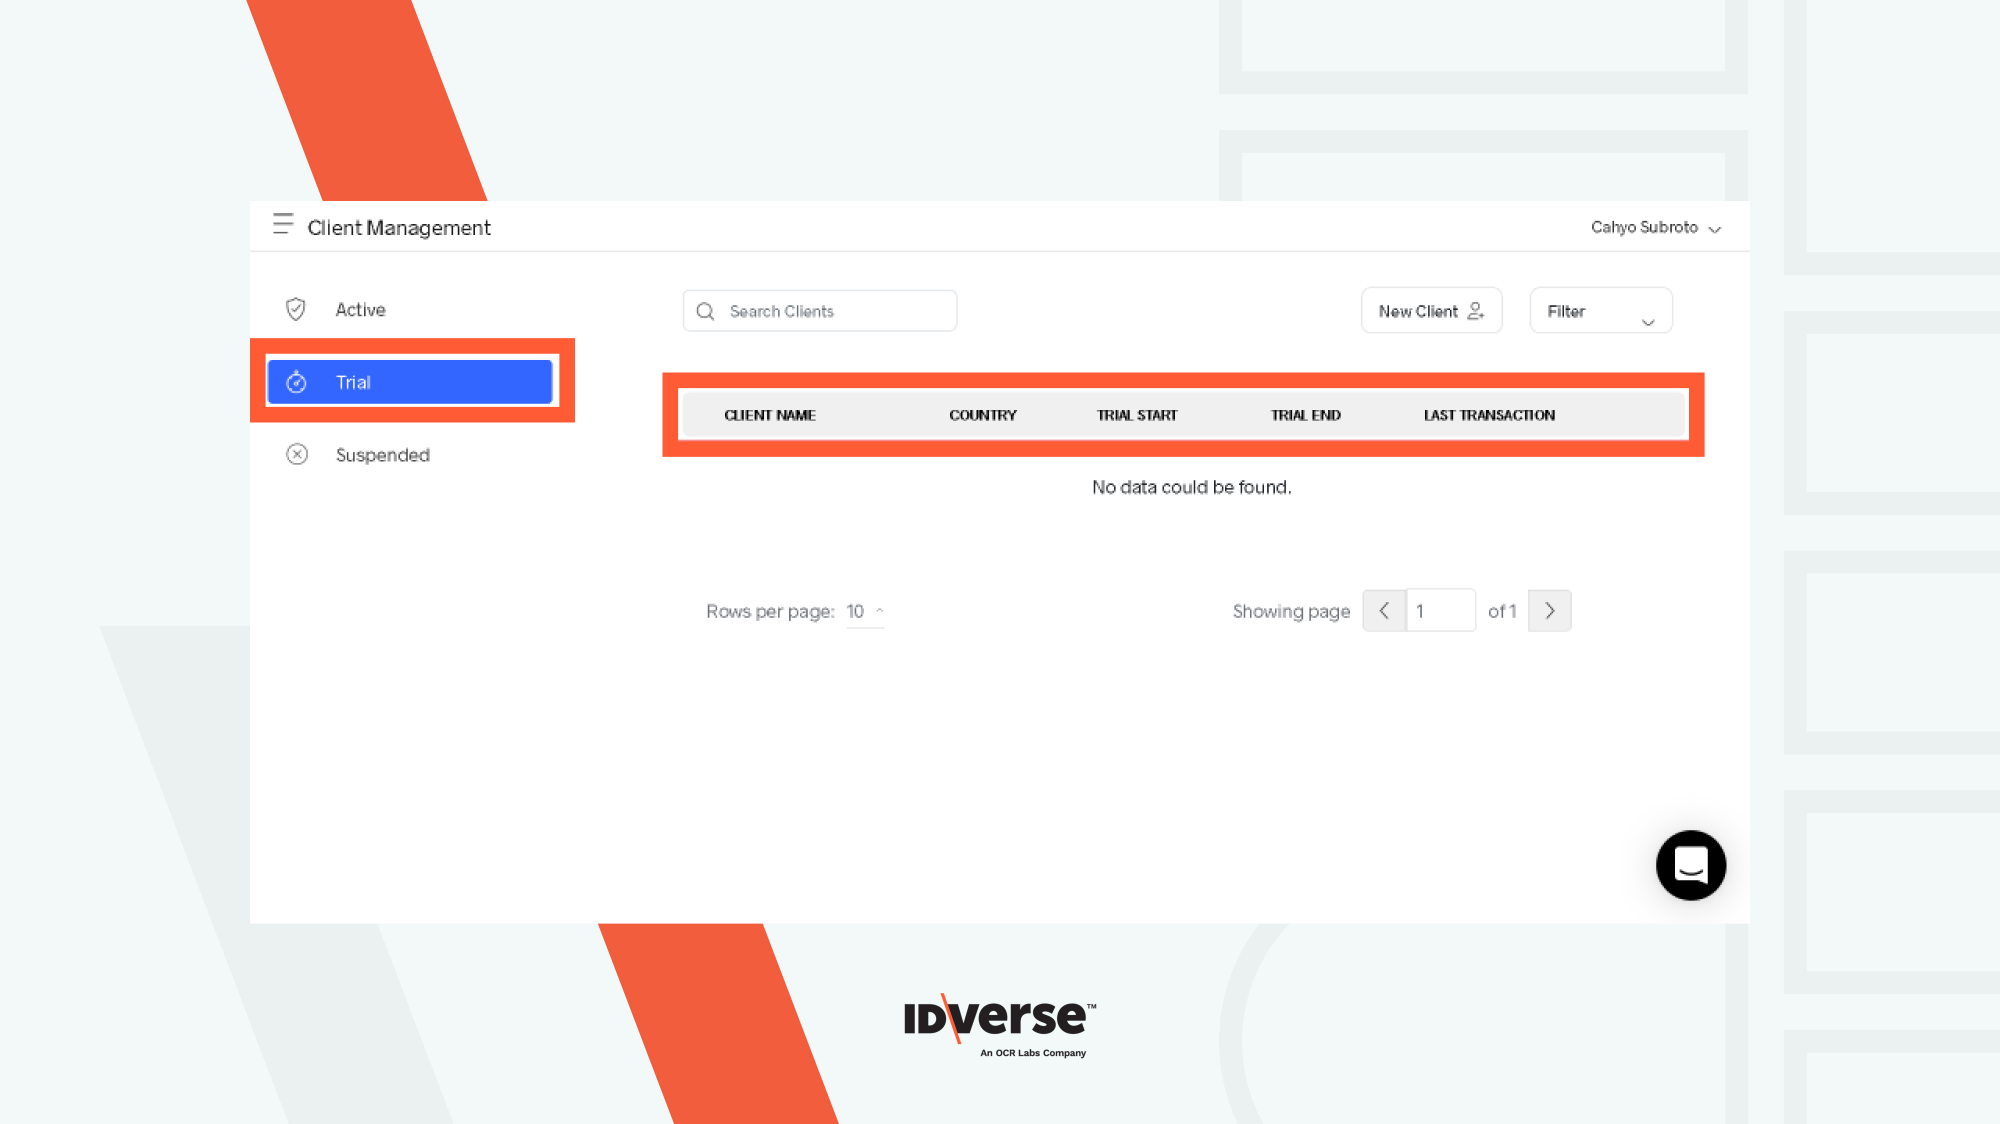
- With the Trial tab selected, all your clients on trial will appear on the list. The columns are categorized by CLIENT NAME, COUNTRY, TRIAL START, TRIAL END, and LAST TRANSACTION from left to right.
- With the Suspended tab selected, all your clients still on suspension will appear on the list. The columns are categorized by CLIENT NAME, COUNTRY, and SUSPENSION DATE from left to right.
Edit the Client Account
- Click on the Clients menu.

- Click on the client's name. Here, you can edit their data, such as their company profile and billing configuration.

- You can also reset their passwords and 2FA. Some changes, like deleting and disabling accounts, are irreversible, so please ensure you have made the right decision.
- Set client flow settings by turning on/off the toggle switch at the desired flow type.

Go to Editor
We provide a feature to modify the verification flow style of a specific client.
- On the same page, scroll down to the bottom and click on the Go to Editor.

- You can edit the flow appearance according to your preference:
- Flow screens
Here, you can customize each verification page's screen title and body text.
.gif")
- Flow style - Logo
Here, you can add, replace, or remove your company's logo.
- Flow style - Colours
You can customize the colour for each page's elements:
.gif")
Background and title bar colour
.gif")
Body font and button colour
.gif")
Loading screen and checkbox colour
Go to Report
Our system is really efficient in obtaining data.
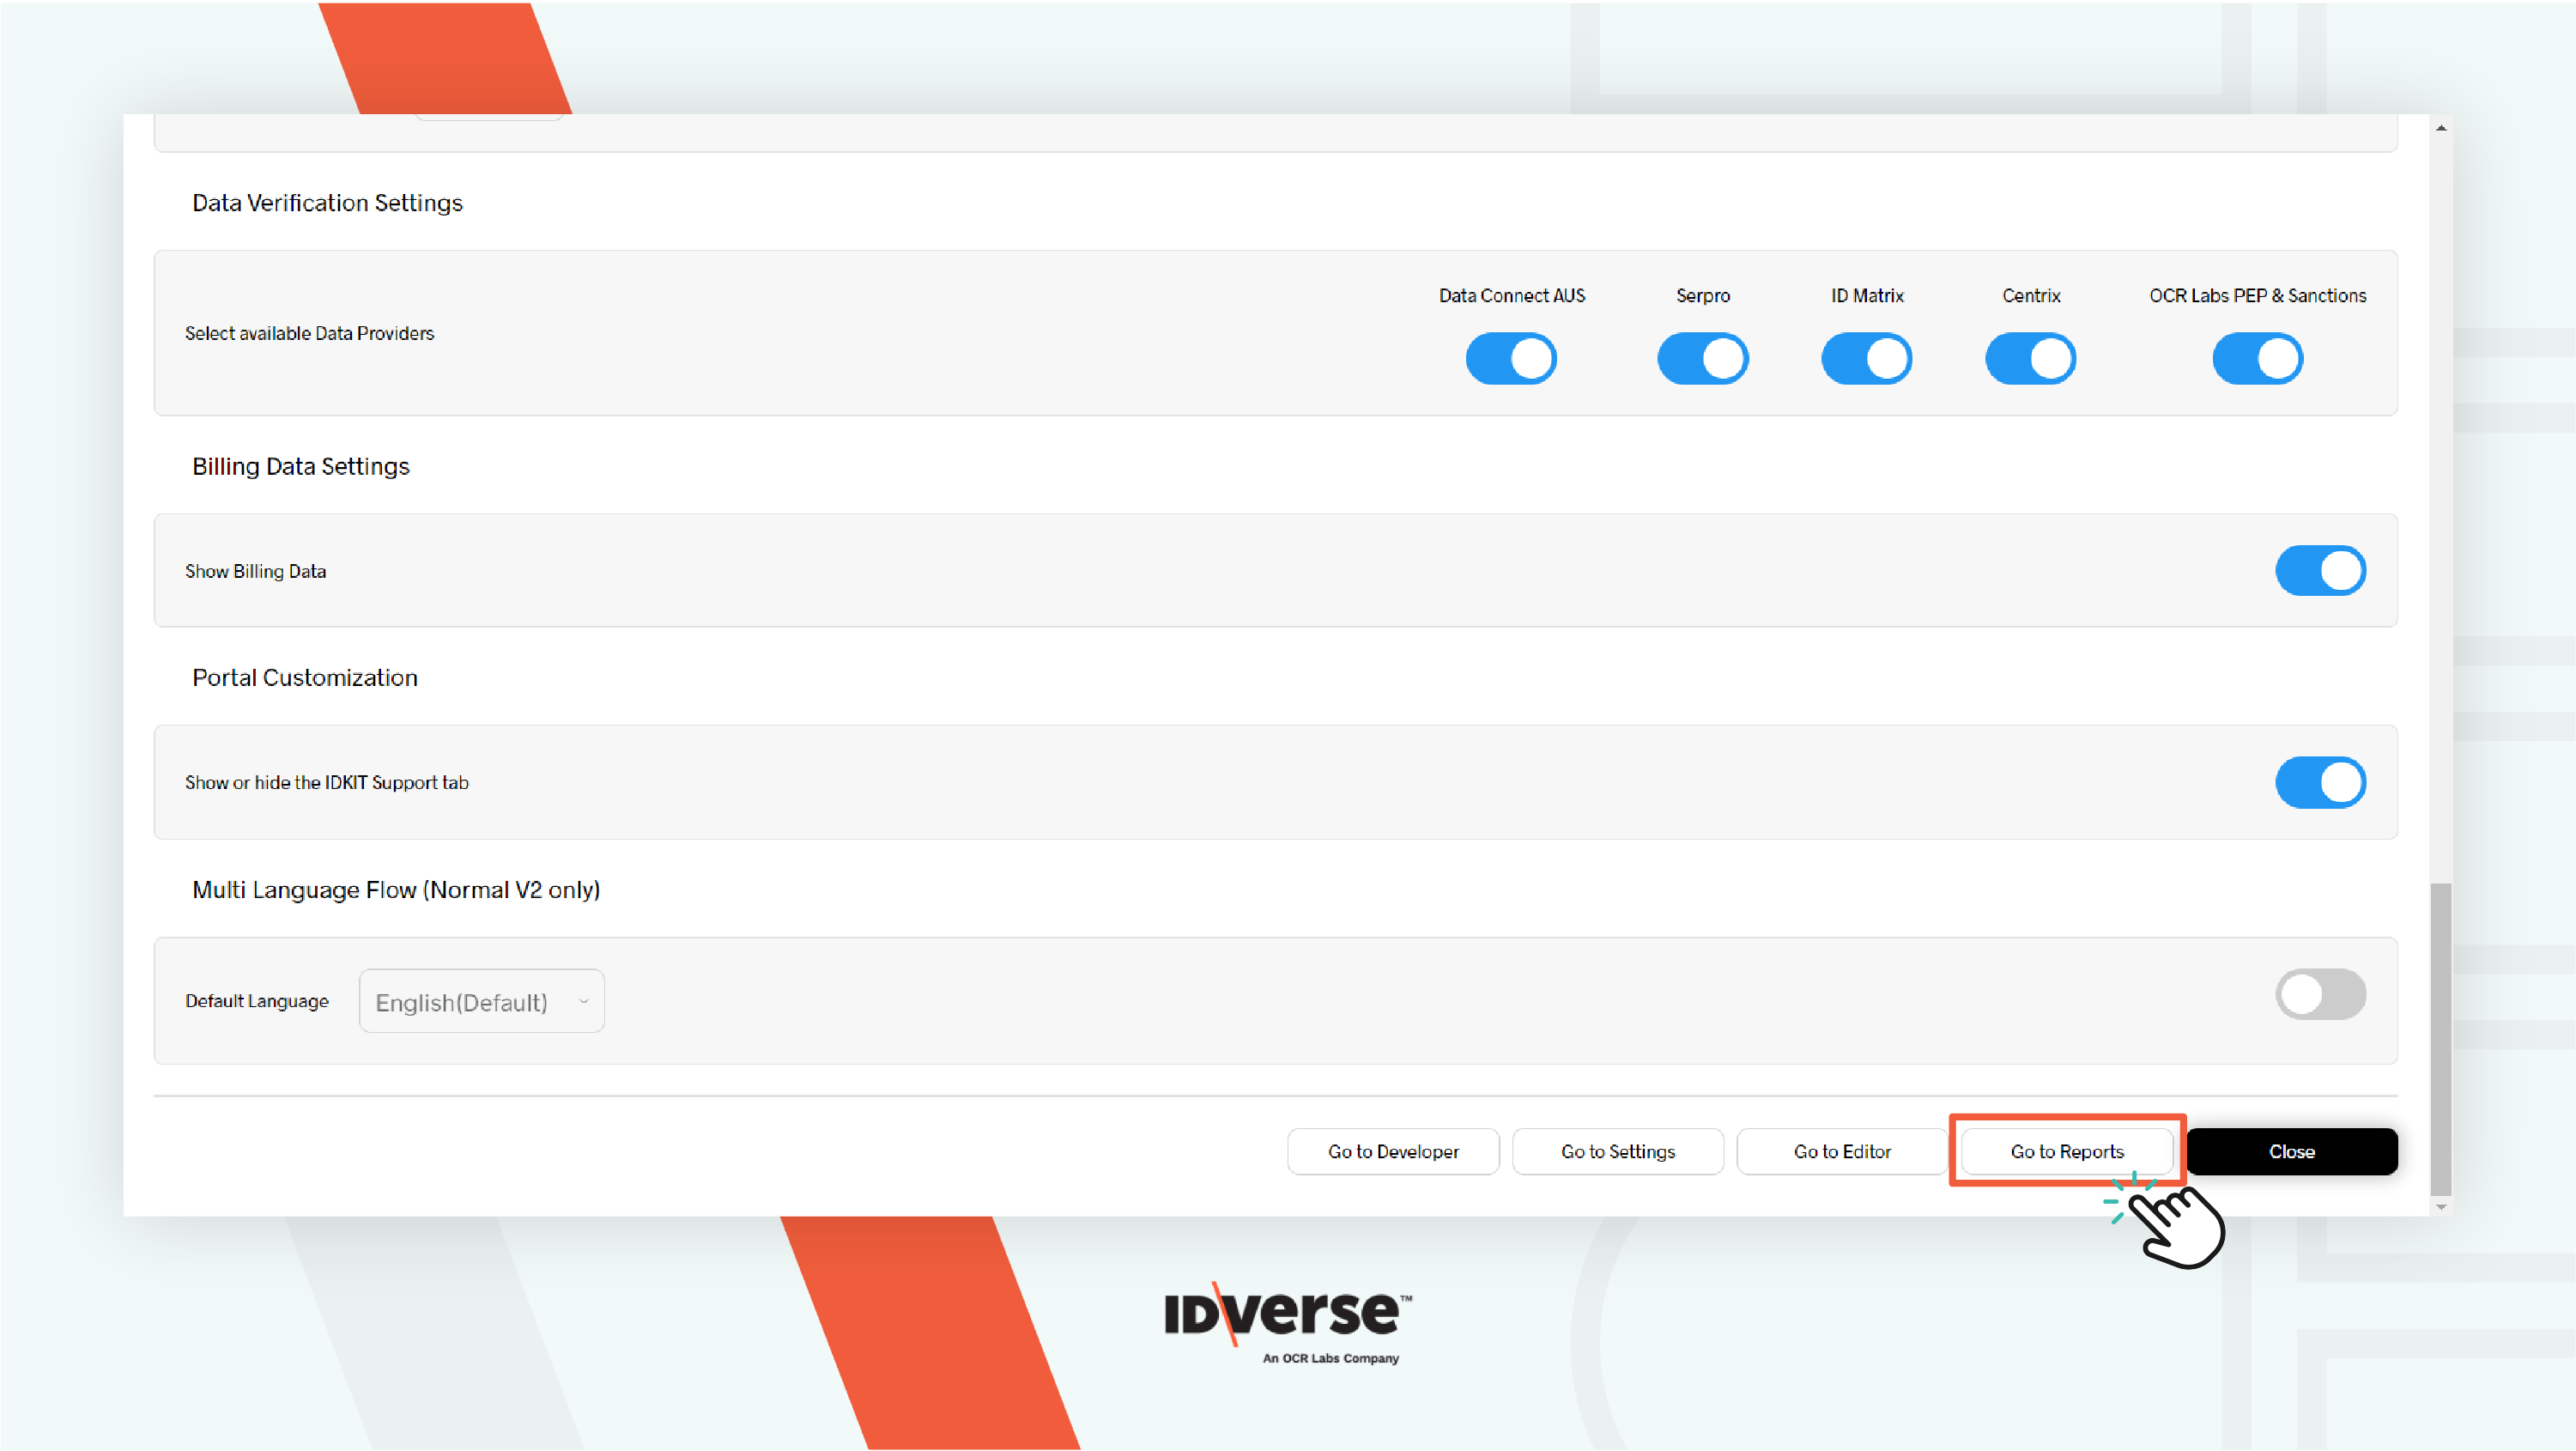
- On the same page, scroll down to the bottom and click on Go to Report.
- You can find and manage the client verification data, which is divided into three reports: Usage, Analytics, and Incomplete.
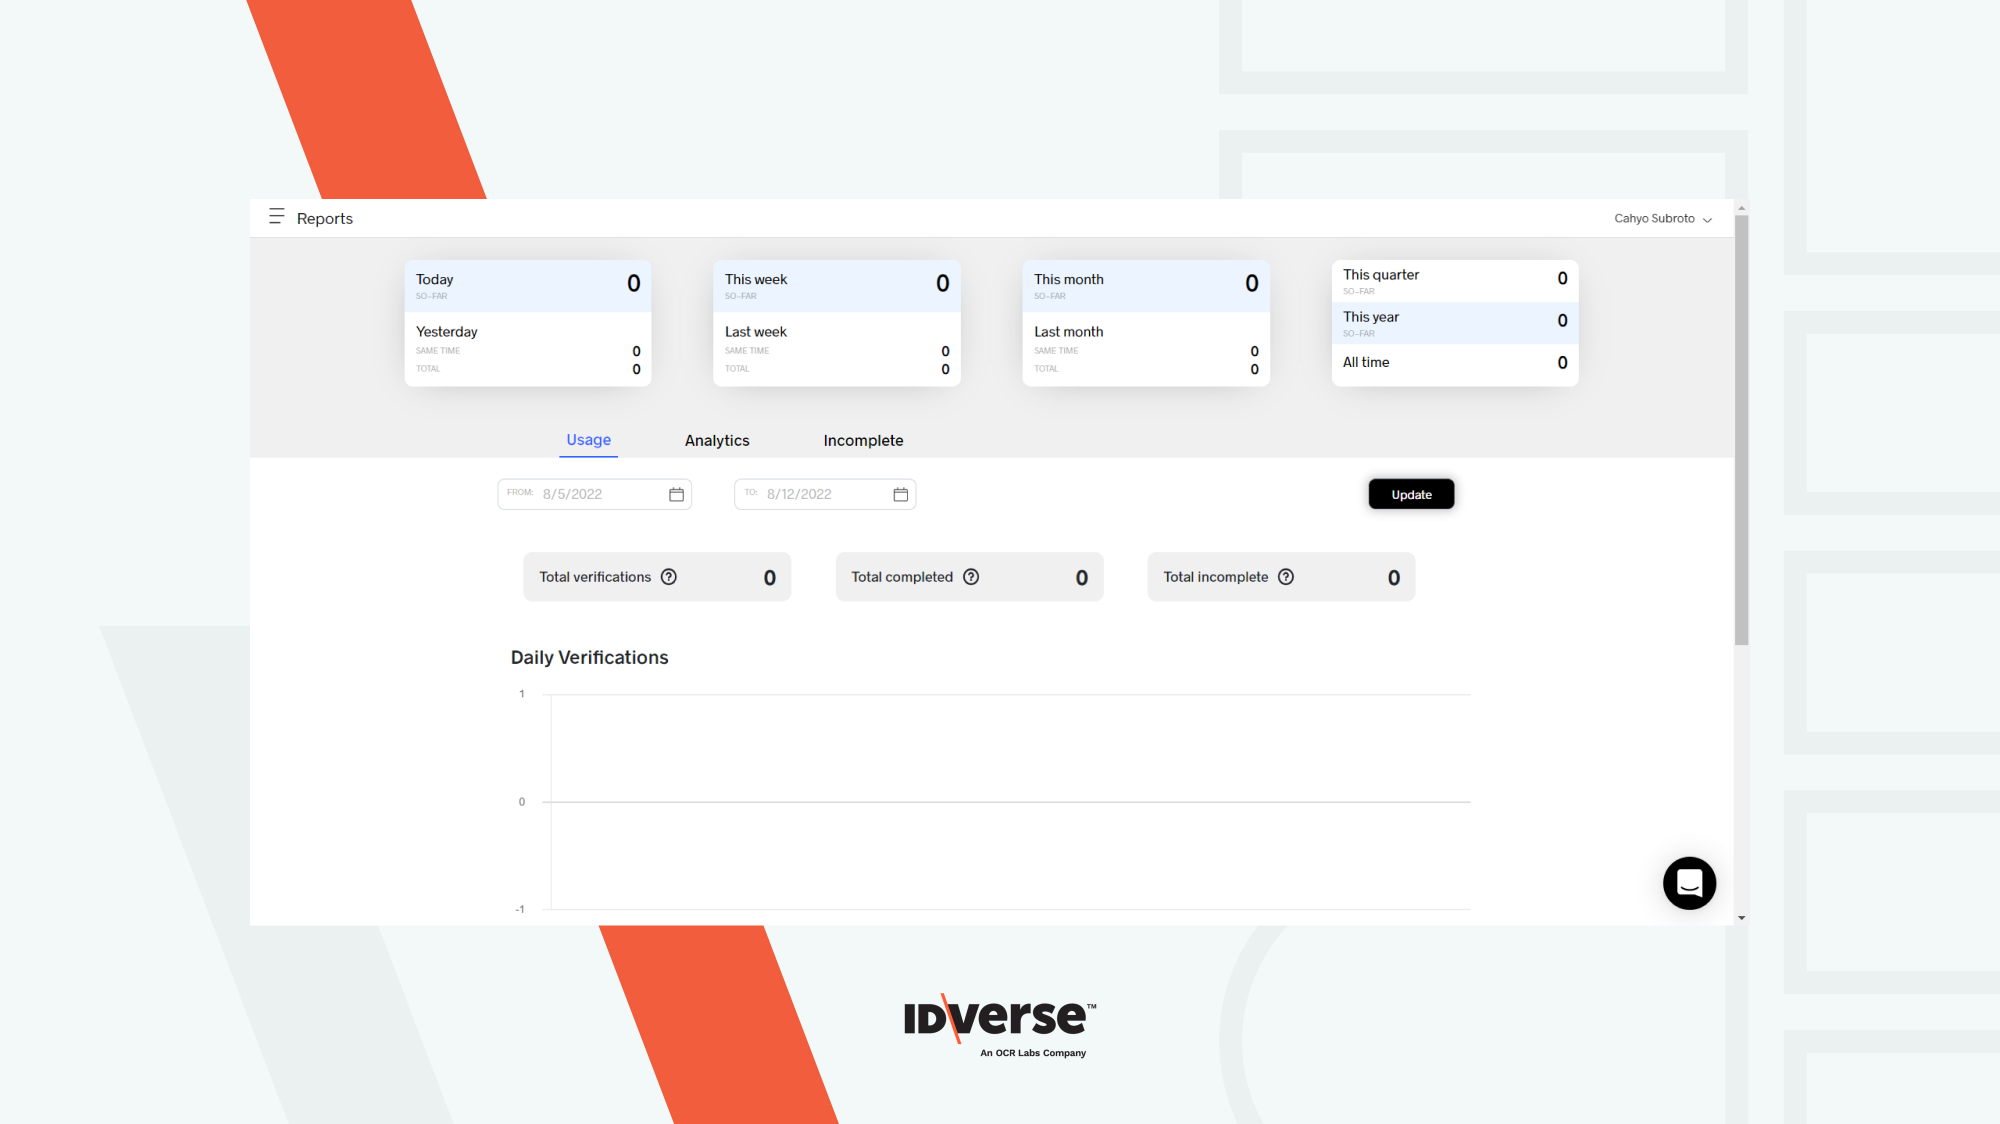
For more information, please refer to the Reports Management.
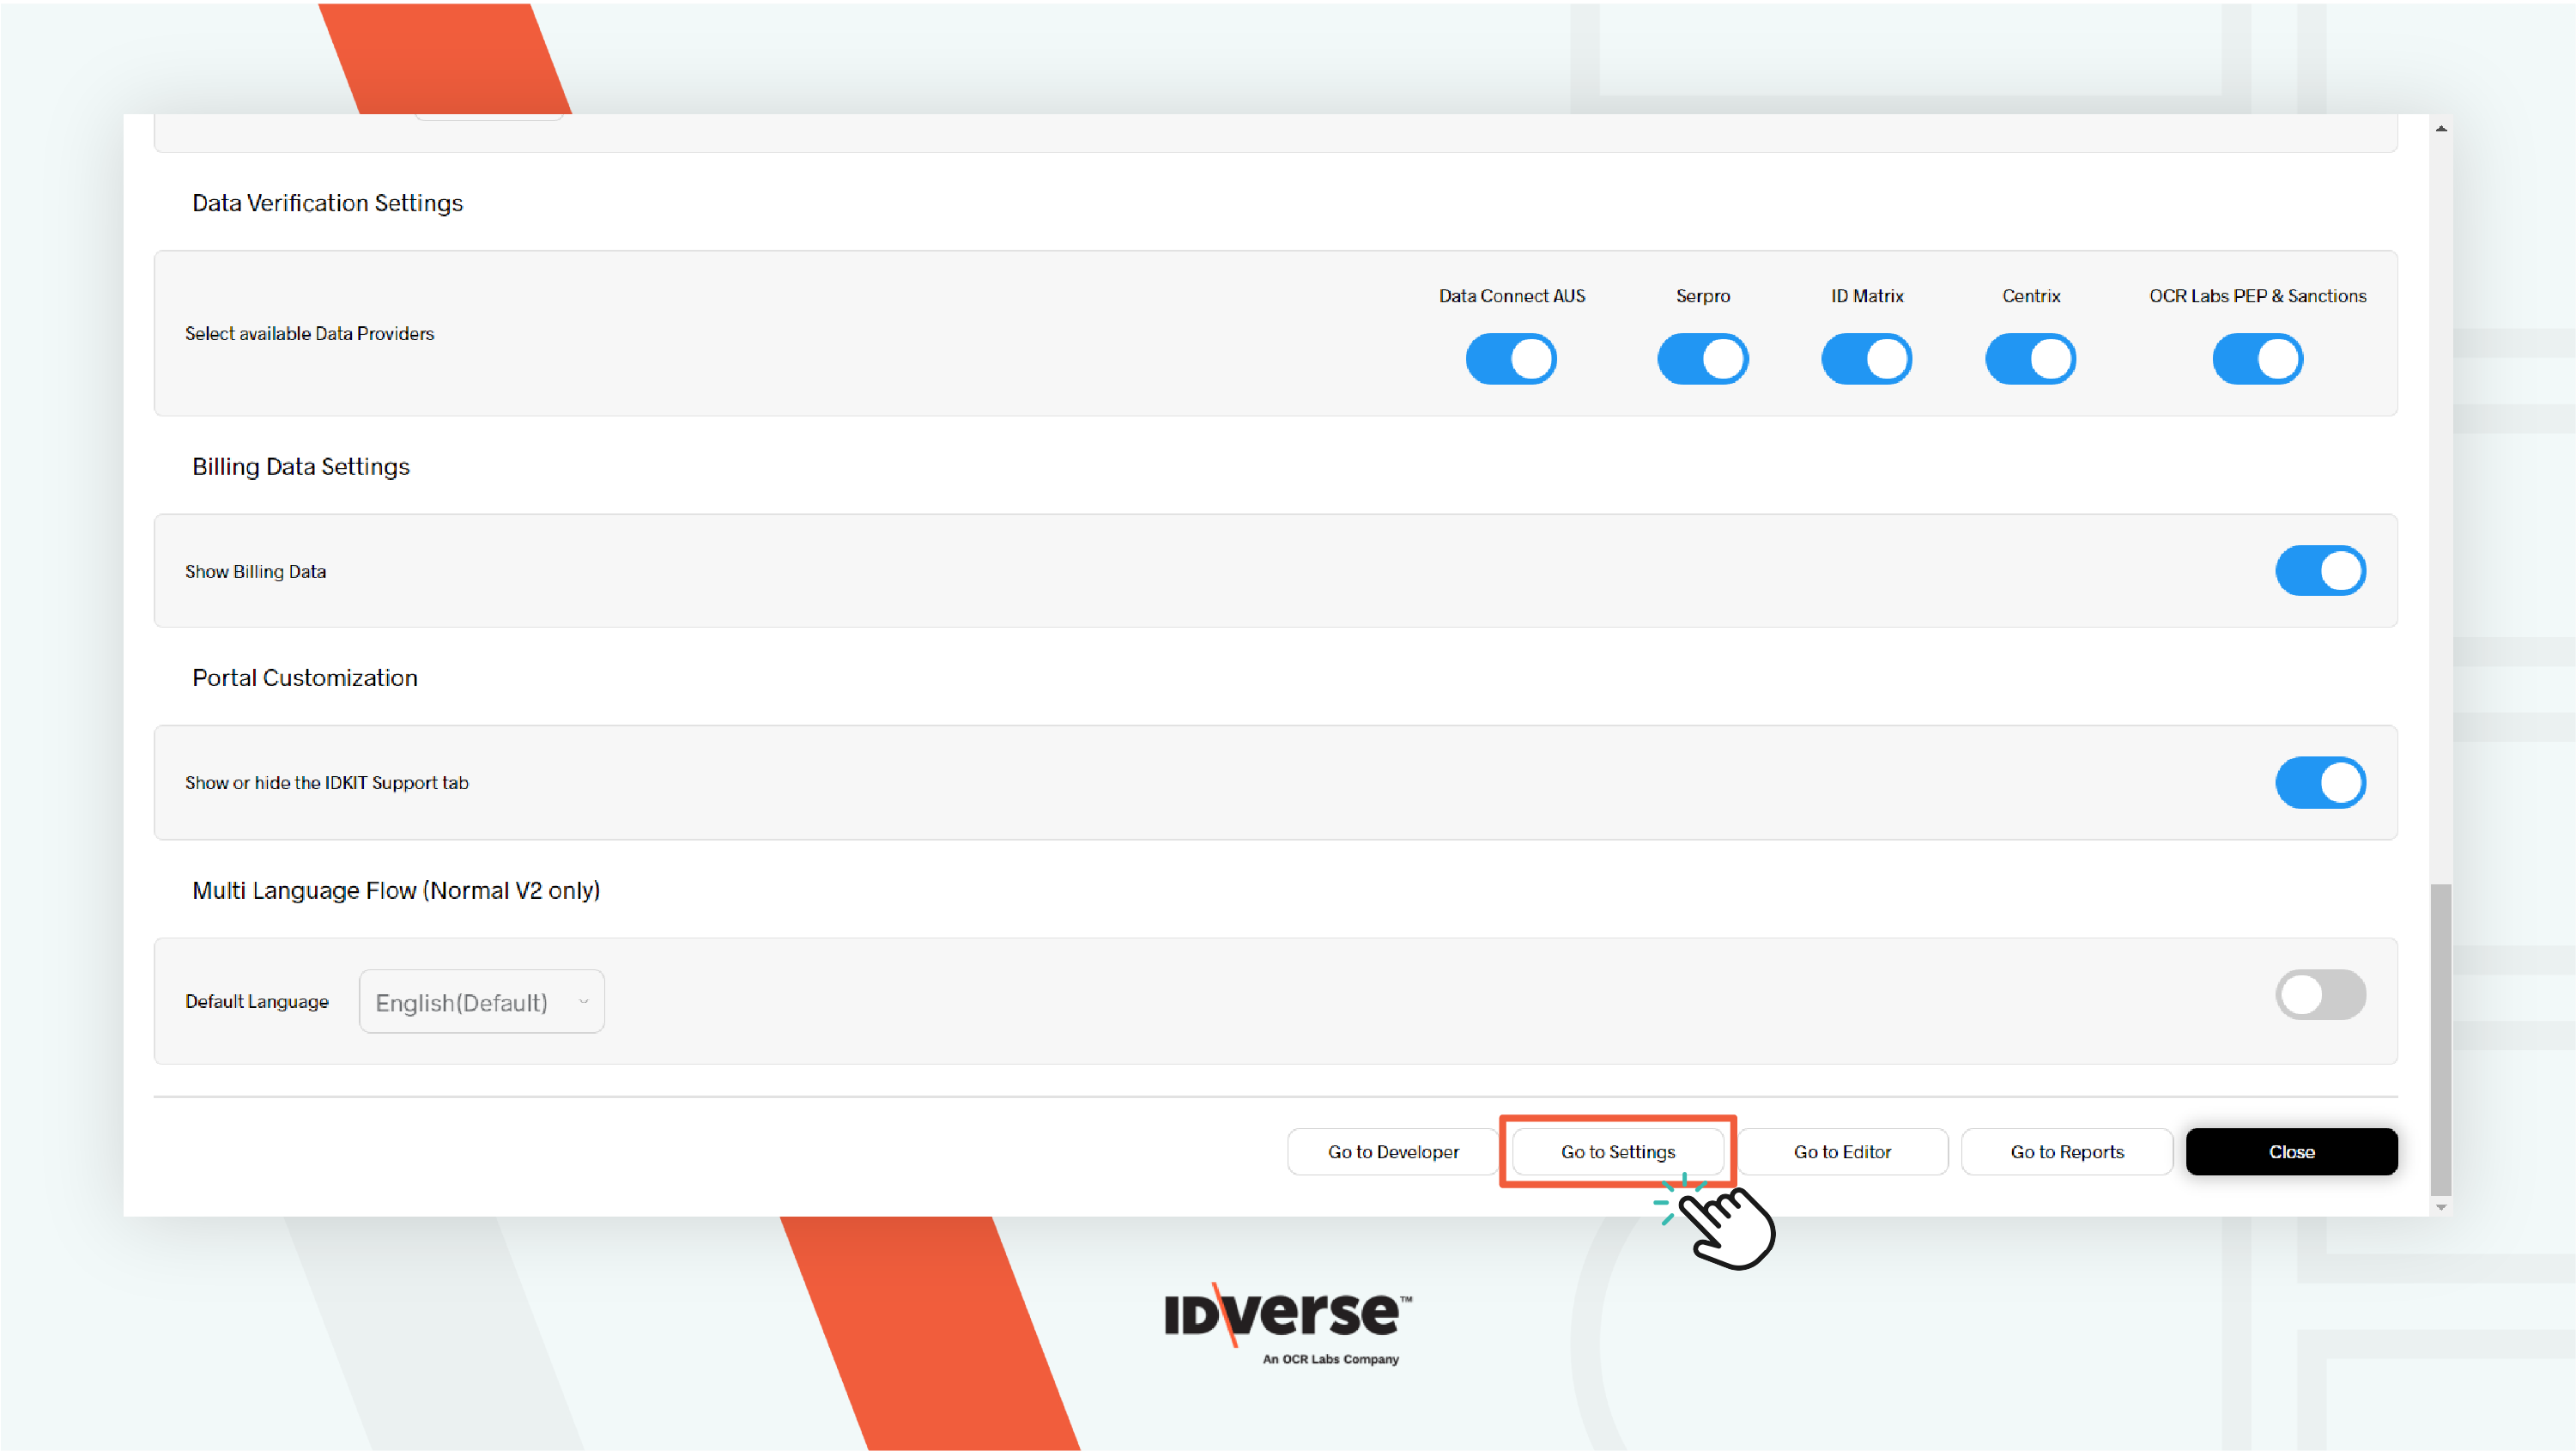
Go to Settings
Settings lets you specify the client's billing email and contact and configure the Sender ID for an existing client.
1. Set Up Billing Email and Contact
- Scroll down to the bottom of the Client Management page and locate the Go to Settings button.

- Click the button, and the system will move you to the client's Account Profile page.

- In the corresponding field, define the billing contact and billing email. Then, hit the Save button.

2. Configure the Sender ID
-
Navigate to the Active clients tab and pick a client.
-
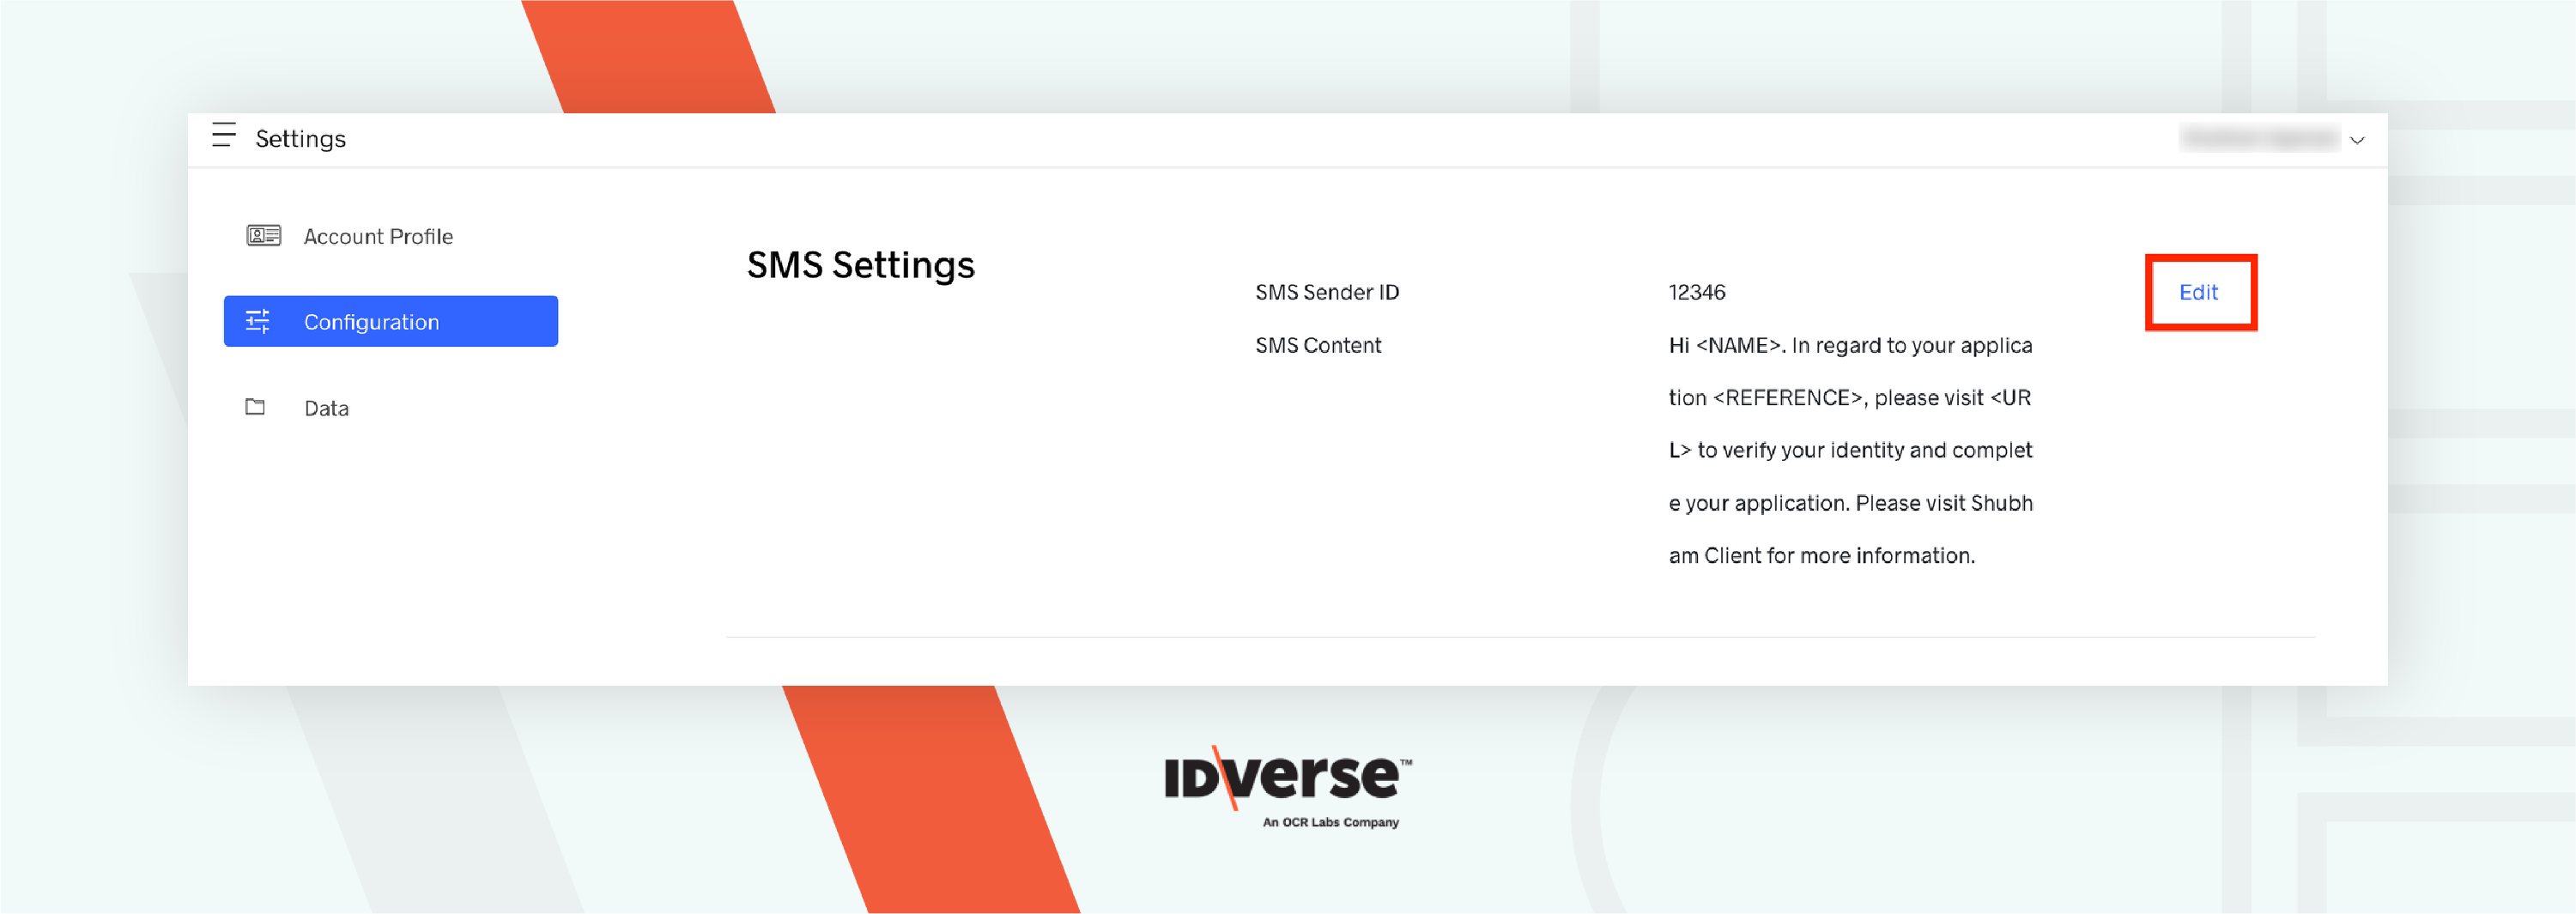
Navigate to the bottom of the client account and select Go to Settings.
-
You will be in the Reseller account. Click Edit.
-
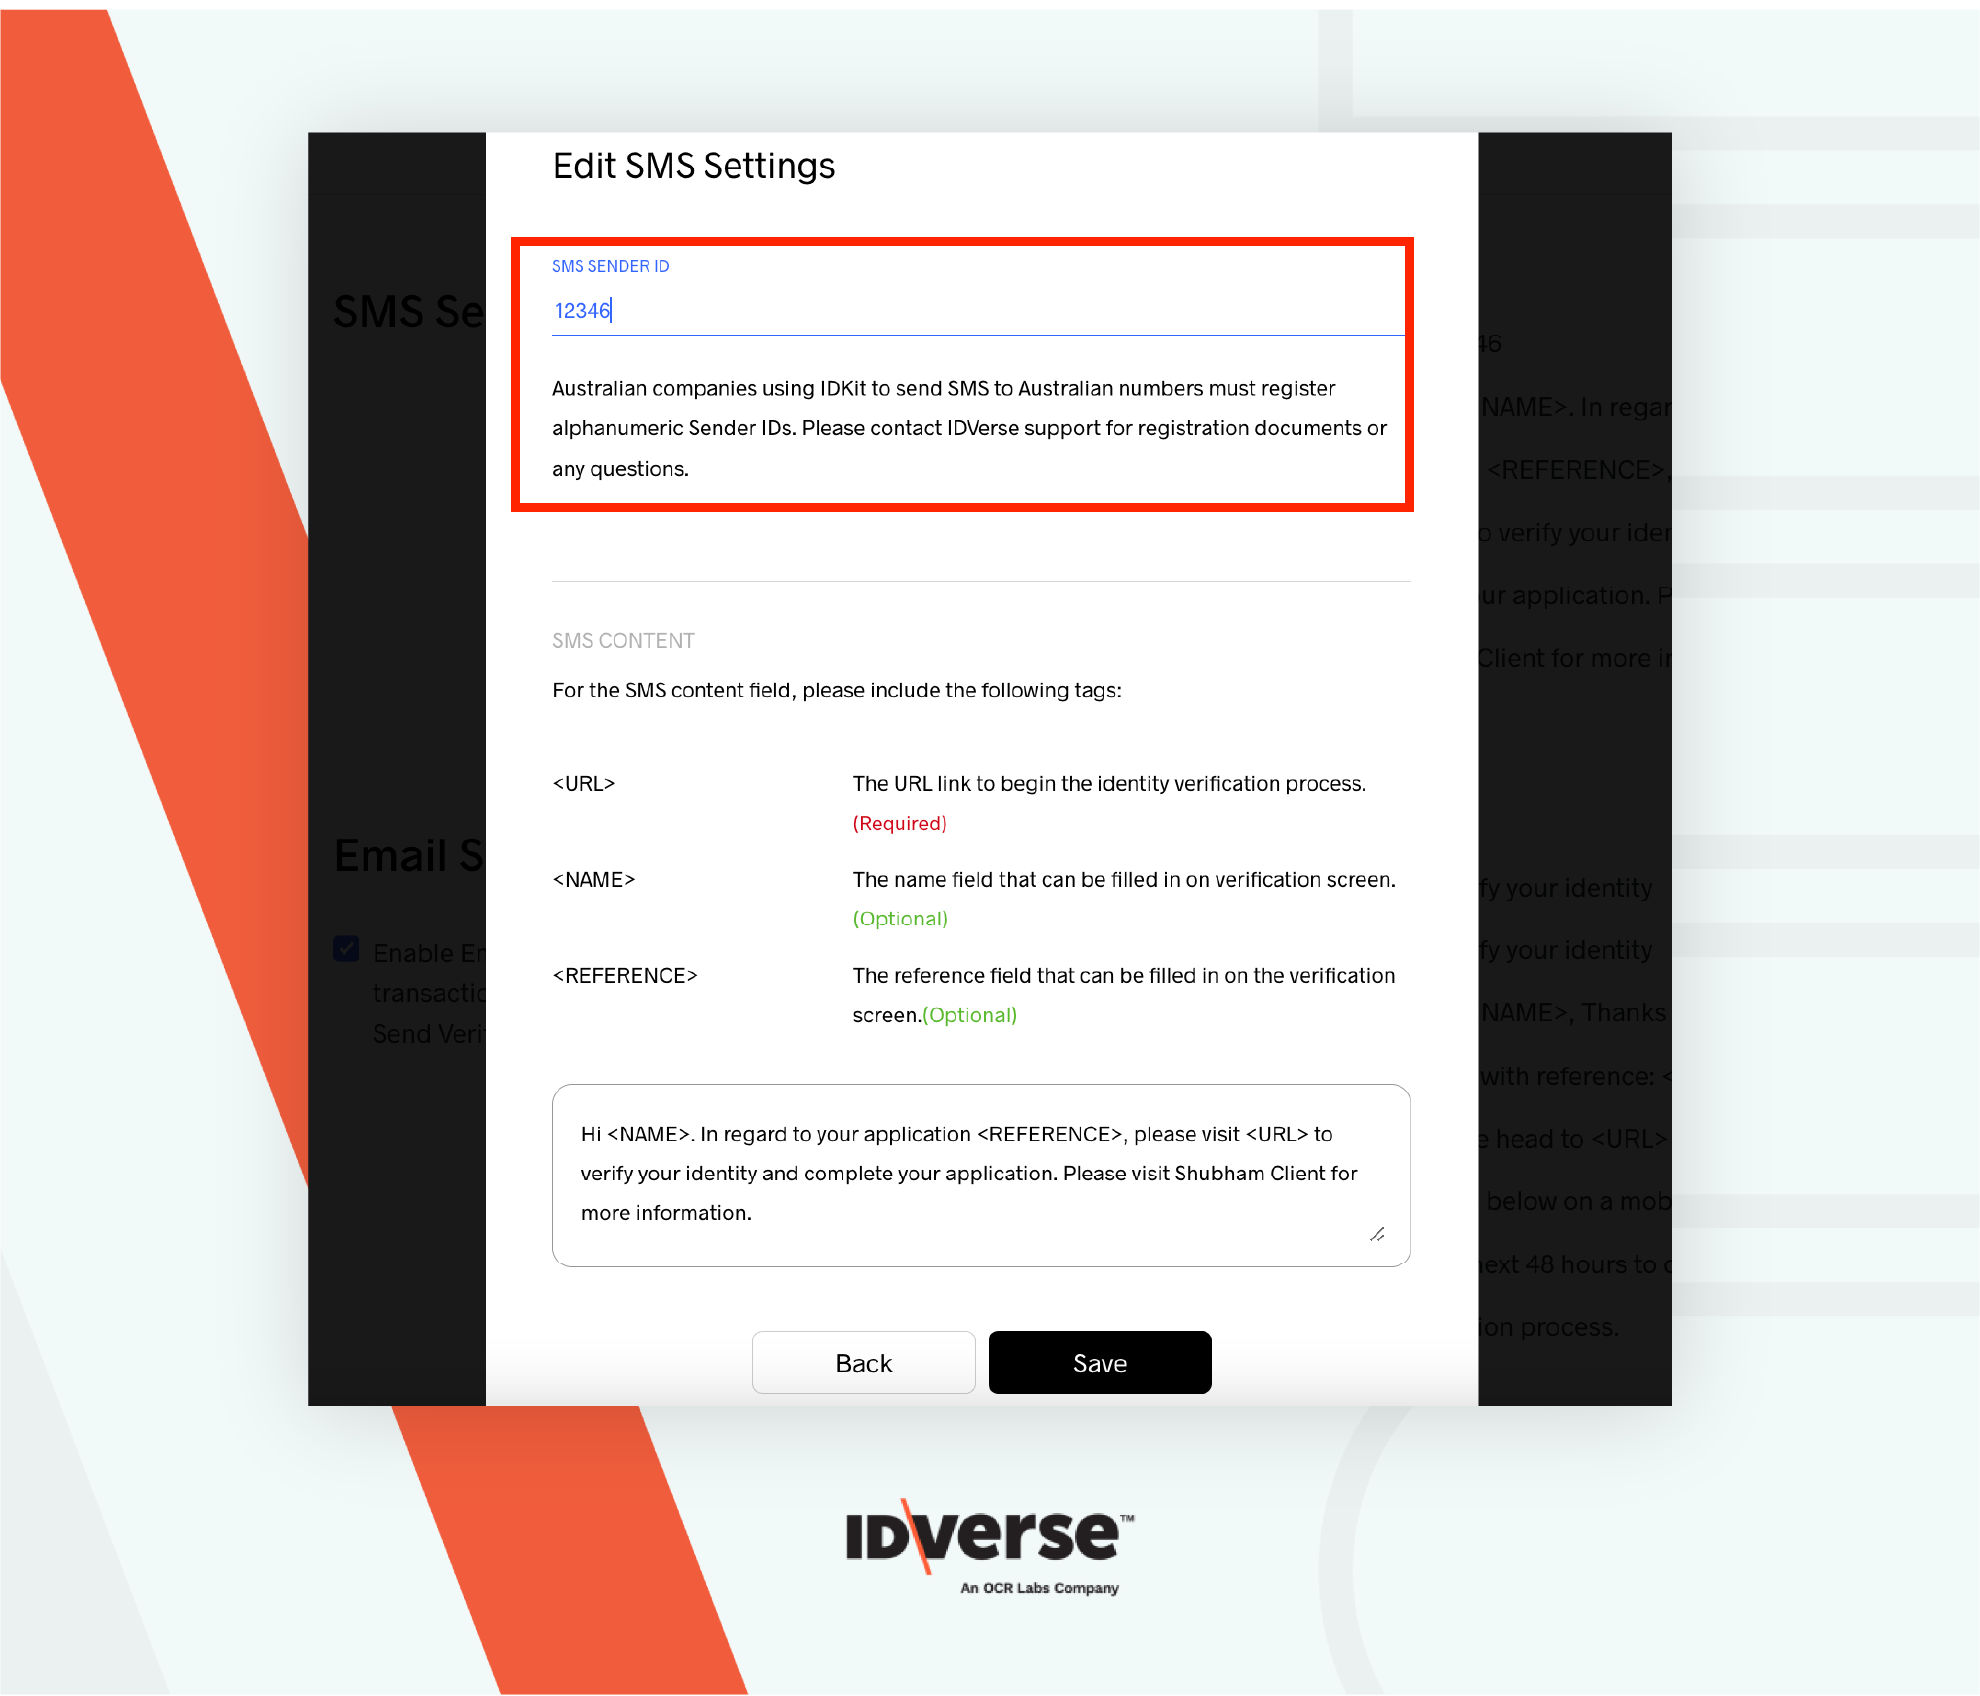
Configure the Sender ID as shown below and click Save.
Go to Developer
The Developer provides you access to check the client's OAuth endpoint and API URL. You can also generate an API Key.
- Scroll down to the bottom of the Client Management page, and you will find the Go to Developer button.
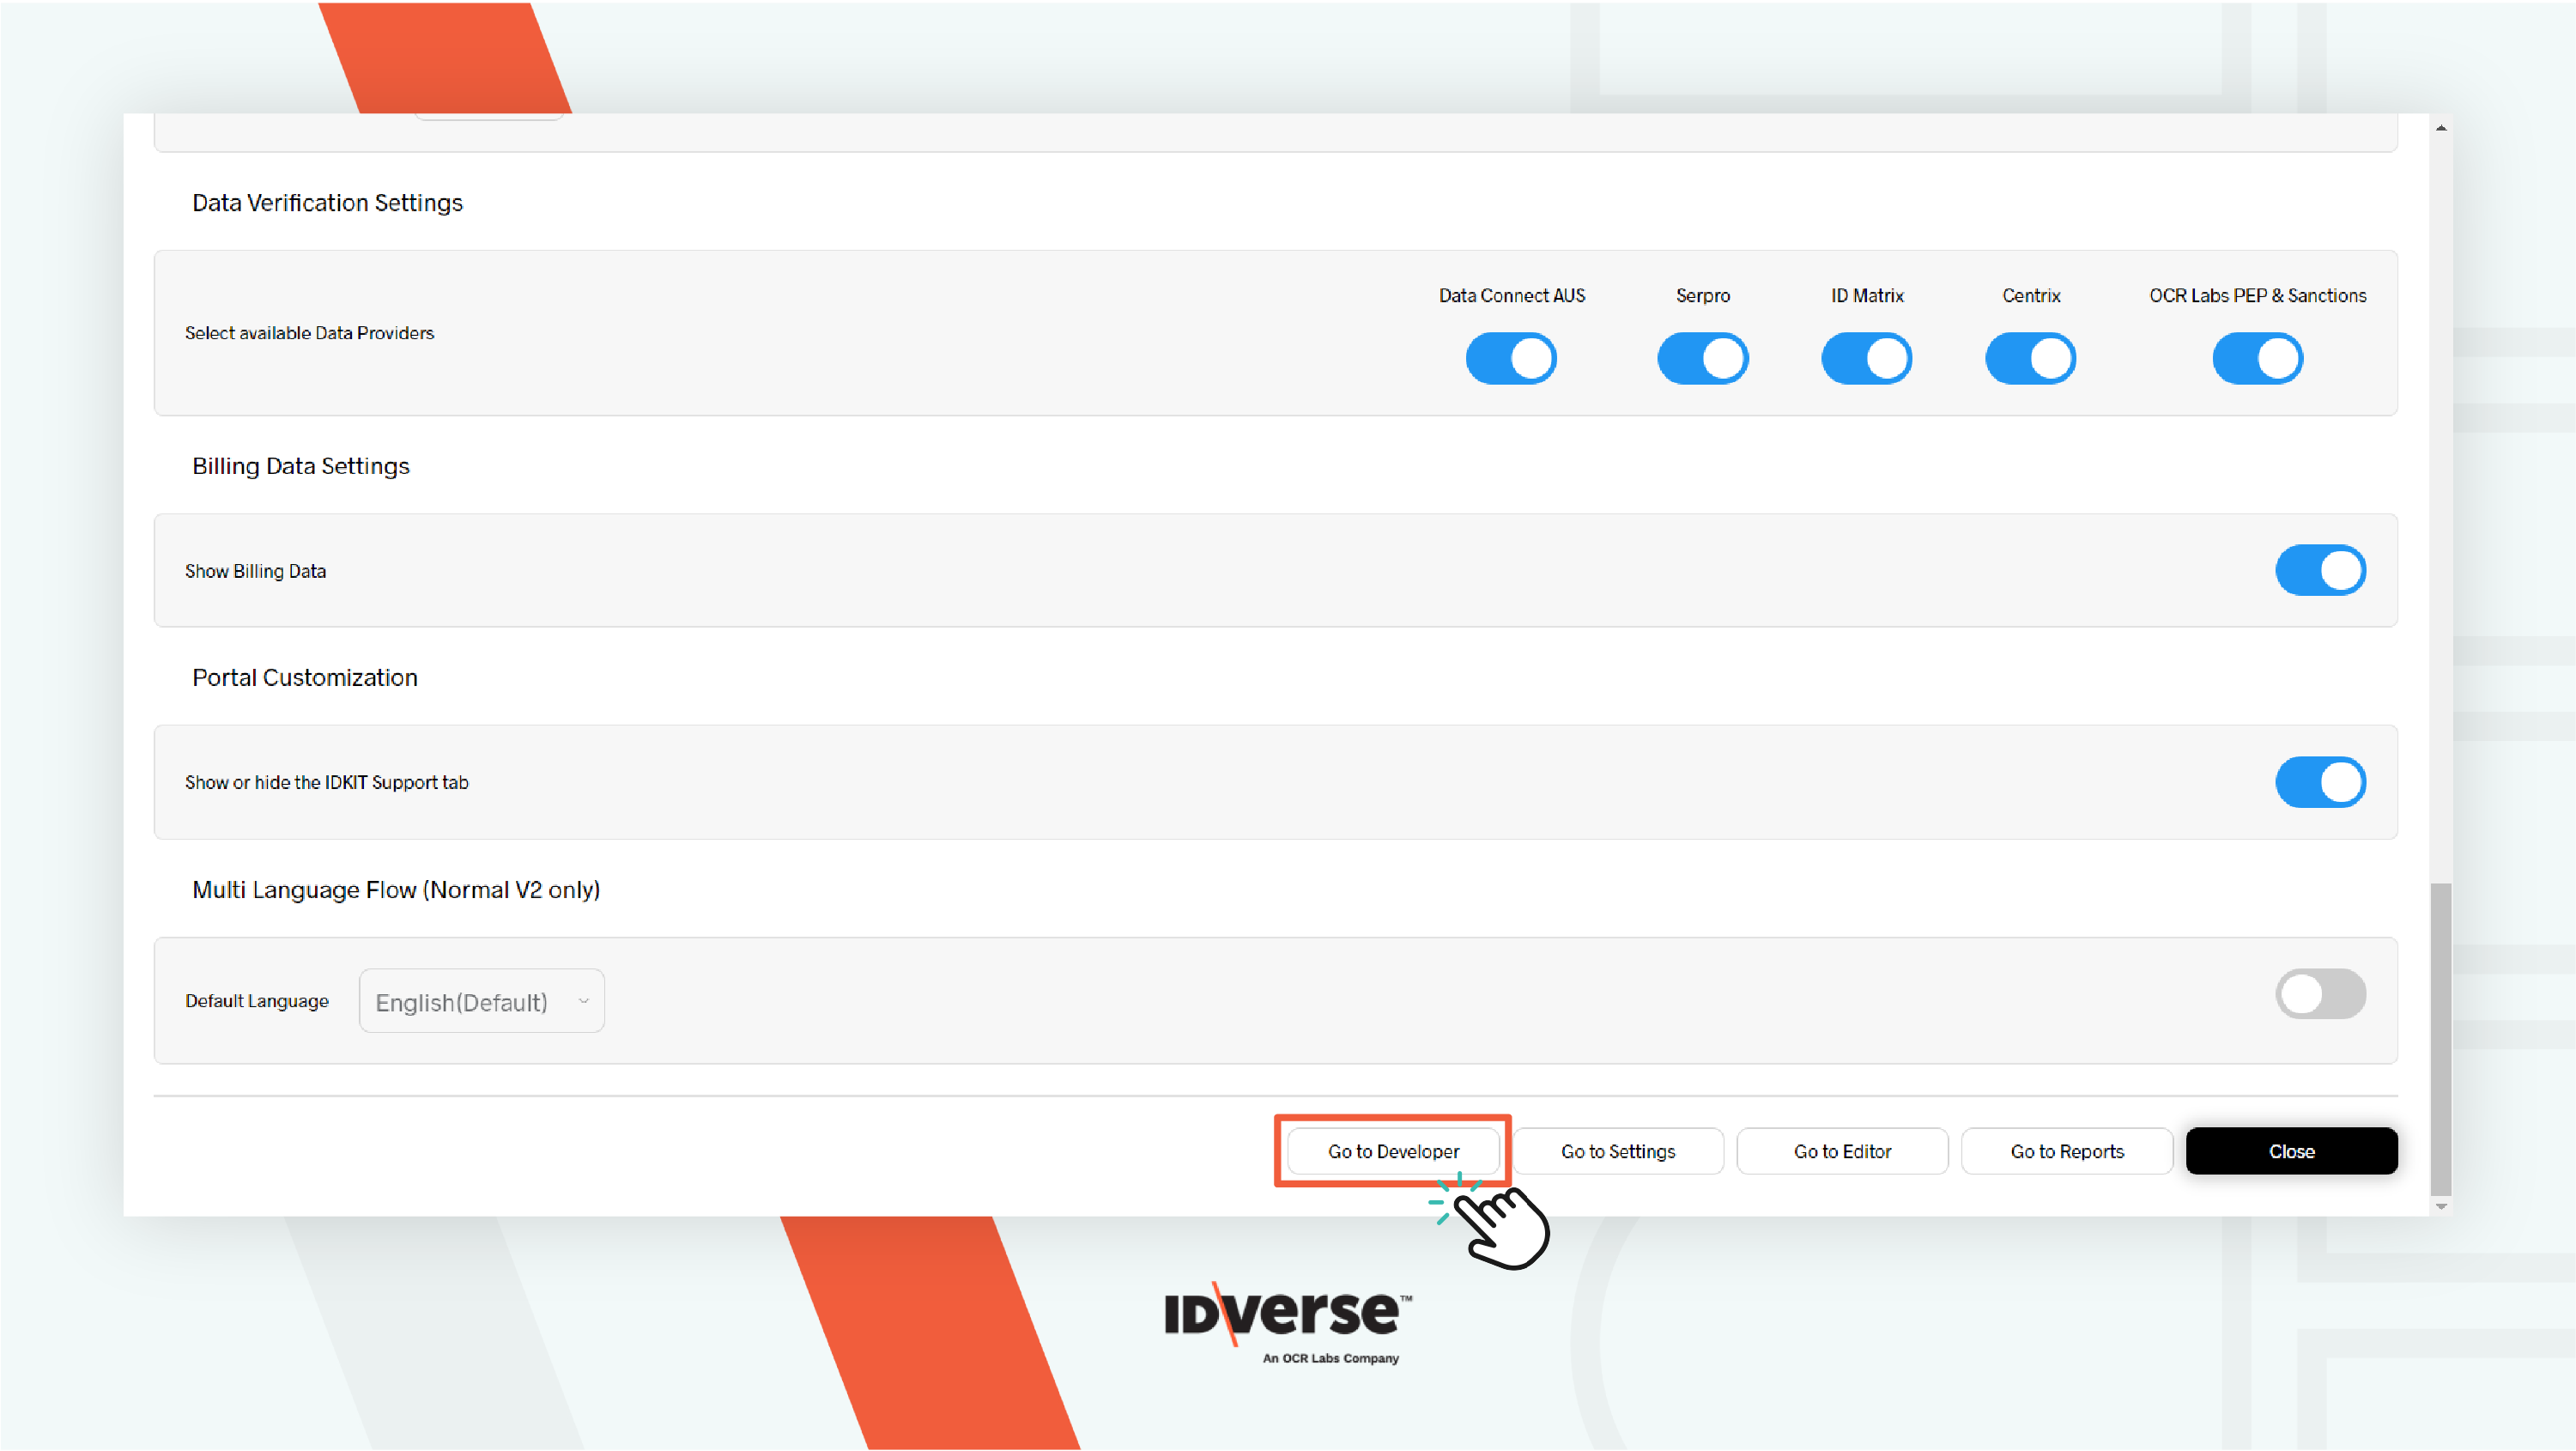
- Once you click the button, you will see the Developer menu, where you can get developer information, such as:
- The endpoint URL: Use this endpoint URL along with your Access Token to generate your OAuth Key, which is required to use the IDKit APIs.
- API URL: The URL that forms the first part of the API endpoint.
- API keys: Generate a unique
api_keyto start using the IDKit APIs. You also can remove the unusedapi_key. - Postman Collection: A collection of IDKit API endpoints and environments.
- Documentation: A guide to help you integrate smoothly.
